


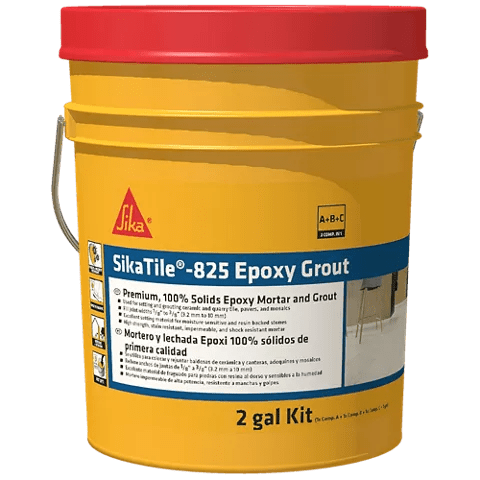
SikaTile®-825 Epoxy Grout
SKU: 648928
100% Solids Epoxy Mortar And Grout
SikaTile®-825 Epoxy Grout is a premium, Epoxy Grout and Mortar with Colored Quartz. It is a three-component, 100%-solids, epoxy grout and mortar formulated for non-sag and non-slump in joints from 1/16" (1.5mm) up to 3/8" (10 mm) in width, water-cleanable and easy to apply. SikaTile®-825 Epoxy Grout uses colored quartz instead of pigment to achieve color consistency, making it excellent for countertops, high-traffic areas, and areas needing stain and chemical resistance.
- Used for setting and grouting ceramic and quarry tile, pavers, mosaics
- Fill joint widths 1/8” to 3/8” (3.2 mm to 10 mm)
- Excellent setting material for moisture sensitive and resin-backed stones
Usage
SikaTile®-825-Epoxy Grout is a 3-component, 100% solids epoxy compound developed for sanitary applications. SikaTile®-825 Epoxy Grout can be used for setting and grouting ceramic tile, quarry tile, pavers, and mosaics on horizontal and vertical surfaces. SikaTile®-825 Epoxy Grout is an excellent setting material for moisture-sensitive and resin-backed tile or stones such as, black, red, and green marbles and metal-backed stone medallions. Use in commercial breweries, dairies, food processing facilities, distilleries, commercial and residential kitchens, bathrooms, and pools. It produces a high-strength mortar and grout that is stain resistant, impermeable, and chemical and shock-resistant. SUITABLE TILE TYPES- Brick and thin brick
- Cement-based precast terrazzo
- Impervious porcelain and glass tile
- Various marbles (green, black, and red)
- Natural stone tile, granite, and slate
- Vitreous, semi-vitreous or non-vitreous tile:
- Ceramic, mosaic, quarry, cement body tile
- Brick Masonry
- Cement Backer Board1
- Cement Mortar Beds (cured)
- Cement Terrazzo
- Ceramic Tile and Stone
- Concrete
- Exterior Grade Plywood2
- Gypsum Drywall2
- Gypsum Mortar Bed
- Gypsum Oriented Strand Board2
- SikaLevel® Products
2 Interior Use Only.
Advantages
- Used for setting and grouting ceramic and quarry tile, pavers, mosaics
- Fill joint widths 1/8” to 3/8” (3.2 mm to 10 mm)
- Excellent setting material for moisture sensitive and resin-backed stones
- High strength mortar that is stain resistant, impermeable, and chemical and shock resistant
- Stain resistant and color consistent grout
- Easy to apply with superior workability and water cleanability
- Non-sag and non-slump in joints, for use in both floor and wall applications
- For interior and exterior applications
- Mold and mildew resistant
- No sealer required
Packaging
2 Gallon (7.57 L) Commercial Unit
Color
Available in 12 colors; Refer to SikaTile® grout kit or color card for actual colors
ENVIRONMENTAL INFORMATION
Sika® is committed to environmental responsibility in both products produced and in manufacturing practices. Use of this product can contribute towards LEED® v4.1 certification:
- Up to 2 points towards MR Credit 5, Regional Materials
- Up to 1 point towards IEQ Credit 4.1, Low-Emitting Materials – Adhesives & Sealants
APPROVALS / STANDARDS
American National Standards Institute (ANSI) — ANSI A108.3 and A118.6 of the American National Standards for the Installation of Ceramic Tile ASTM International (ASTM)
- Exceeds ANSI A118.3 specifications. Conforms to requirements for chemical-resistant, water cleanable tile setting and grouting epoxy found in ANSI A108.6 and ANSI A118.3.
- Resilient Floor Covering Institute - (RFCI) Recommended Work Practices for Removal of Resilient Floor Coverings
- Tile Council of North America (TCNA) - TCNA Handbook for Ceramic Tile Installation, TCNA EJ171 Movement Joint Guidelines.
|
Property |
Test Method |
Requirement |
Typical Results |
|
Water Cleanability |
ANSI A118.3 Section 5.1 |
> 80 minutes |
> 90 minutes |
|
Initial Set |
ANSI A118.3 Section 5.2 |
> 2 Hours |
> 5 Hours at 70oF (21oC) |
| Sag in Vertical Joints | ANSI A118.3 Section 5.4 | No Change | Pass |
| Shear Bond Strength to Quarry Tile | ANSI A118.3 Section 5.5 | > 1,000 psi |
Chemical Base
Epoxy resin, hardener and colored quartz
Shelf Life
12 months from date of production when stored in original, sealed package
Storage Conditions
Store in undamaged, original, sealed package, in dry conditions at 73⁰ F (23⁰ C)
MIXING
Employ all appropriate safety equipment before use. Refer to the Safety Data Sheet for details.
SikaTile®-825 Epoxy Grout parts A (2 lbs.), B (1 lbs.) and C (10 lbs.) are packaged to ratios for proper curing. Stir then pour all material from the Part A containers into the mixing bucket then repeat using Part B. To ensure product performs to specifications empty out all contents of Part A and Part B by using a margin trowel to thoroughly scrape all material from the containers. Add all of Part C colored powder. Always mix complete units and do not add any other materials to this mixture. Use a slow-speed mixer (at 300 rpm), or manually mix with a margin trowel. Avoid prolonged mixing, which will trap air and shorten the pot life. Mix thoroughly until a homogenous, consistent color is obtained with a thick peanut butter like consistency. Scrape the edges of the mixing container at least once during mixing. Wash tools immediately with water before the epoxy hardens. Do not place the lid on the container after the material has been mixed.
APPLICATION
Read all installation instructions before installation.
For use as a grout:
Remove mixed SikaTile®-825 Epoxy Grout product from the container and place it in small piles (if grouting a wall, place the product on kraft paper laid on the floor). Use an epoxy grout float with a sharp edge to force the grout into the joints in a continuous manner, leaving it flush with the tile edge and be sure that all joints are well-compacted and free of voids or gaps. Thoroughly remove excess grout from the face of the tile before it loses its plasticity or begins to set by holding the rubber float at a 90-degree angle to the tile surface and dragging the float across the tile surface diagonally to the grout lines. Clean tiles immediately after applying each unit of SikaTile®-825 Epoxy Grout by applying a liberal amount of cold water to the freshly grouted area. Scrub the tile surface diagonally to the joint line using a white nylon scouring pad. Apply enough pressure on the pad to loosen any film without removing grout from the joints. Rinse pads frequently while cleaning. To remove the loosened epoxy residue and water, drag a clean sponge diagonally across the tile surface. Use one side of the sponge for each pass over the tile, rinsing the sponge following the second pass and regularly changing water in the buckets to avoid residue buildup. Do not allow SikaTile®-825 Epoxy Grout to harden on the tile surface. Do not step on freshly cleaned tiles, as this could permanently damage the grout.
For use as a mortar:
Remove the mixed SikaTile®-825 Epoxy Grout product from the container and place it in piles on the floor. Choose a notched trowel with sufficient depth to achieve more than 80% mortar contact to both the tile and substrate for all interior applications, and more than 95% for exterior, commercial floor and wet applications. It may be necessary to back-butter the tile to meet these requirements. With pressure, apply a coat of mortar by using the flat side of the trowel to key the mortar into the substrate. With the notched side of the trowel, apply additional mortar by combing it in a single direction parallel to the shortest dimension of the tile. Spread only as much mortar as can be tiled before the product skins over. Open time can vary with jobsite conditions. Set tiles firmly into the wet mortar and push the tiles back and forth in a direction perpendicular to trowel lines to collapse the mortar ridges and to help achieve maximum coverage.
FINAL CLEAN UP:
After 24 hours, the grout installation can be cleaned with clean water. Cleaning with acid is not recommended.
MOVEMENT JOINTS:
All expansion, control, construction, cold, saw-cut, isolation, contraction, and seismic joints in the structure should continue through the tilework, including such joints at vertical surfaces, as specified per TCNA Method EJ171 or TTMAC Specification Guide 09 30 00, Detail 301MJ.
PROTECTION:
Do not disturb grout or walk over installed tiles for at least 24 hours after setting. Do not allow any activity in the area that will cause dirt or debris to become embedded in the grout joints as they are curing. Do not allow heavy traffic over installed tiles for at least 48 hours after setting. For residential showers and tub surrounds, restrict use for 10 days after grouting before water immersion or exposure to chemicals. For steam showers, restrict use for 14 days after grouting.
MAINTENANCE:
Sealing is not required. Grout must be fully cured for 3 days before regular cleaning. To maintain a clean tile surface, use a neutral-pH cleaner for maintaining the floor, followed by a clean-water rinse. Do not use harsh chemical cleaners to maintain the tile surface. Before proceeding with cleaning, consult the cleaner’s manufacturer for compatibility, use, and application instructions. Remove or rinse fatty acid residue from the grout surface to avoid potential grout deterioration caused by prolonged exposure.
CLEANING OF TOOLS
Clean tools and tile with water before the material dries.