Granite CNC work depends on tooling matched to the machine, spindle, stone, and operation. A bit that performs well during roughing may be wrong for profiling, pocketing, or finishing. That remains true even when the shank appears compatible.
The best CNC bits for granite fabrication match the cutting task with the right diamond tooling material, segment or rim design, shank, diameter, and spindle capability. Confirm the feed rate and machine limits before ordering. Adjust cutting conditions for the granite and the required finish.
Start by separating the job into its actual operations. Roughing tools prioritize material removal. Profiling and finishing require control at the edge and across the surface. Evaluate each bit against the cut it must make, the machine driving it, and the result the fabricator needs.
Which Are the Best CNC Bits for Granite Fabrication?
The right bit depends on the shape you need to produce, not simply on the fact that the workpiece is granite. Profile work, material removal, hole making, and detail cutting each place different demands on the tool. Match the bit geometry to the operation first, then verify the bond, diameter, shank, coolant requirements, and machine settings before ordering.
Bullnose and profile work
Use a profile bit when the goal is to create a shaped edge, such as a bullnose, demi-bullnose, ogee, or another countertop profile. The working edge is formed to the intended radius or contour, so the tool can establish a repeatable shape with fewer interpolated passes than a straight cutter. Select the profile that matches the finished edge, and confirm the tool's diameter and bearing or guide arrangement if the setup uses one. A roughing profile tool may remove stock quickly, while a finishing profile tool is better suited to refining the edge before polishing.
Router bits for shaping and stock removal
Diamond router bits are the practical choice for pocketing, edge preparation, flattening localized areas, and removing granite stock before a finishing pass. A larger working diameter can cover more surface per pass, while a smaller router provides access to tighter areas and inside corners. Sintered diamond tooling is commonly selected for aggressive stock removal because the bond is built to hold diamond through demanding work. Do not treat a router bit as a universal profile tool. Use a controlled stepdown and leave an appropriate amount of material for the finishing operation.
Core bits for holes and cutouts
Core bits are designed to remove a ring of material and produce cylindrical holes for sinks, faucets, plumbing, and other fixtures. Choose the diameter from the required finished opening, allowing for the fit and clearance specified by the fixture manufacturer. A stable spindle, accurate positioning, and effective water delivery matter as much as the segment design. Water helps cool the cutting zone and carry debris away, but it also creates slurry that must be managed safely and kept away from sensitive equipment.
Engraving bits for fine detail
Engraving bits use a narrow point or specialized tip to create lettering, lines, small channels, and decorative detail. They remove much less material than a router, so they require careful toolpath planning and conservative engagement. Check the tip geometry against the required line width and depth, and test on a scrap piece when the finish or lettering must be consistent. Granite varies in mineral composition, and that variation can affect edge quality and wear. For a broader selection, review the CNC tooling for granite collection and match each tool to its intended operation.
Diamond, PDC, Carbide, or Electroplated: Which Tooling Material Fits?
For granite fabrication, diamond is the default starting point because granite's high hardness demands an abrasive cutting surface that can stay effective under sustained contact. The best CNC bits for granite fabrication are not defined by one material alone, though. Bond, tool geometry, operation, coolant, and the finish you need all change the right choice.
| Material or construction | Best fit | What to verify before ordering |
|---|---|---|
| Diamond, general | Routine granite cutting, profiling, routing, drilling, and finishing where controlled material removal and edge quality matter. | Diamond type, bond hardness, tool diameter, operating method, and the machine's coolant delivery. |
| Sintered diamond | Aggressive stock removal and heavy-duty roughing, when the job requires a durable working surface rather than a final finish. | Whether the bond matches the granite's density and abrasiveness, plus the machine's available power and chip clearance. |
| PDC | Specialized tooling or drilling applications where a PDC design is specifically engineered and tested for the material and cutting conditions. | Do not assume hard-rock drilling performance transfers directly to every CNC granite operation. Confirm the tool's intended stone, geometry, and recommended parameters. |
| Carbide | Limited or specialized work, such as non-abrasive materials, secondary operations, or a tool design that explicitly permits granite contact. | Carbide is not a default choice for sustained granite cutting. Check the manufacturer's application range, expected wear, and finish requirements. |
| Electroplated diamond | Applications that benefit from a concentrated exposed diamond layer, such as detail work, profiling, or a specific small-batch tool requirement. | Available diamond exposure, usable working life, re-plating or replacement options, and whether the tool is intended for wet use. |
Research on diamond tooling identifies diamond as essential for working granite's high hardness. While PDC research is more appropriately treated as evidence for a specialized hard-rock application rather than a universal granite recommendation. Sintered diamond bonds are suited to aggressive stock removal, but that does not make them the right finish tool for every edge or profile. Match the construction to the operation, then confirm the maker's feed, spindle, and coolant guidance before putting the bit into production.
How Do Shank, Diameter, and Machine Compatibility Affect the Choice?
The right CNC bit is only useful if it matches the machine, holder, material, and programmed operation. Before comparing bonds or profiles, confirm the complete mechanical interface. A compatible tool runs more predictably, while a mismatch can create vibration, poor finish, premature wear, or a toolpath that cannot be executed safely.
Start with the shank, collet, and thread
Check the shank diameter against the machine's collet or toolholder, not just the nominal diameter of the cutting head. The holder must clamp the shank on its intended surface, with clean contact and no damage. If the tool uses a threaded connection, verify the thread size, direction, shoulder, and mating arbor. A tool that appears close enough may still seat incorrectly or bottom out before it is secure.
Confirm the machine's tool-change requirements as well. Some routers and CNC platforms use a specific holder system, while others require an arbor, adapter, or collet range that is not interchangeable. The product specification should state the shank or mounting format. If it does not match your machine documentation, stop and resolve that question before ordering.
Match working diameter and stickout to the job
Tool diameter affects access, cutting load, corner radius, and the amount of clearance required around the workpiece. A larger profile may remove material efficiently, but it may not reach a tight inside corner or fit the programmed path. A smaller tool can access more detail, yet it may require additional passes and careful setup.
Keep stickout as short as the operation allows while still reaching the feature. Excessive projection increases leverage and makes runout and deflection more noticeable. Measure the available clearance around the spindle, collet, tool body, fixture, slab, sink cutout, and any raised workholding. Include the full tool assembly, not just the diamond-covered portion.
Verify runout and coolant delivery before cutting
Inspect the holder, collet, and tool for chips, burrs, or visible damage. Even small runout can make one side of a bit work harder than the other, which may show up as uneven wear or edge quality. Also verify that coolant can reach the cutting zone at the programmed position. Routing, profiling, and drilling operations may need different nozzle angles or clearance for water and debris evacuation. Never assume a coolant line will clear the tool until the spindle is positioned over the actual work area.
When reviewing CNC tooling for granite, compare the listed shank, thread, cutting diameter, overall length, working length, and intended operation with your machine setup. If any field is unclear, confirm it with the tool documentation or supplier before placing the order.
What Starting Feeds and Speeds Should You Use for Granite?
There is no universal RPM or feed rate for granite CNC work. Use the tool manufacturer's chart as the starting point, then validate it on your machine with a controlled test pass. Feed, spindle speed, and cutting conditions affect both edge quality and cutting forces in granite. So the correct setting is the one that produces a stable cut on your specific tool, stone, coolant system, and machine.
- Identify the complete cutting setup. Record the tool diameter, number of cutting edges or segments, grit and bond, shank size, intended operation, and the granite being machined. A small engraving or profiling tool does not share the same starting conditions as a larger router or core bit. Note whether the cut is roughing, profiling, drilling, or finishing.
- Start with the manufacturer's recommendations. Use the chart supplied for that tool and material class rather than copying a setting from another bit. If the chart gives a range, begin conservatively, especially when the machine's rigidity, spindle condition, or workholding is uncertain. The chart is a starting window, not a promise of production performance.
- Confirm coolant and chip evacuation. For wet machining, establish a consistent flow that reaches the cutting zone and carries abrasive debris away. Coolant helps manage heat, but it does not compensate for poor clearance or an unstable setup. Keep the work area clean enough to see the cut and inspect the tool between passes.
- Run a shallow test pass. Secure the scrap or workpiece, verify tool stickout and zero, and make a light pass before committing to the full depth or profile. Listen for chatter, watch the spindle load, and inspect the granite edge. A stable cut should not produce sudden vibration, excessive chipping, burning, or a glazed tool.
- Observe the chip and dust behavior. Granite does not produce a simple metal-like chip, but the cutting sound, debris, edge finish, and tool temperature still reveal whether the tool is engaged properly. Excessive rubbing can indicate insufficient feed, an unsuitable bond, or a dull tool. Heavy vibration, large chips, or edge breakout can indicate too much engagement, inadequate support, or an overly aggressive feed.
- Adjust one variable at a time. After the test pass, change feed or spindle speed gradually while holding depth, stepover, coolant, and toolpath constant. If the machine remains stable but the tool rubs or polishes, a modest feed adjustment may improve engagement. If chatter or chipping increases, reduce engagement and revisit rigidity, workholding, and tool condition before raising speed.
- Document the proven combination. Save the final settings with the tool identification, diameter, granite type, operation, coolant method, depth, and stepover. Research on granite machining shows that machining conditions influence cutting forces and edge quality, while feed and spindle settings also affect chipping and tool life. Treat each validated setup as shop data, not a universal rule. Review the machining research when refining a repeatable process.
How Do You Extend CNC Bit Life and Protect the Finished Edge?
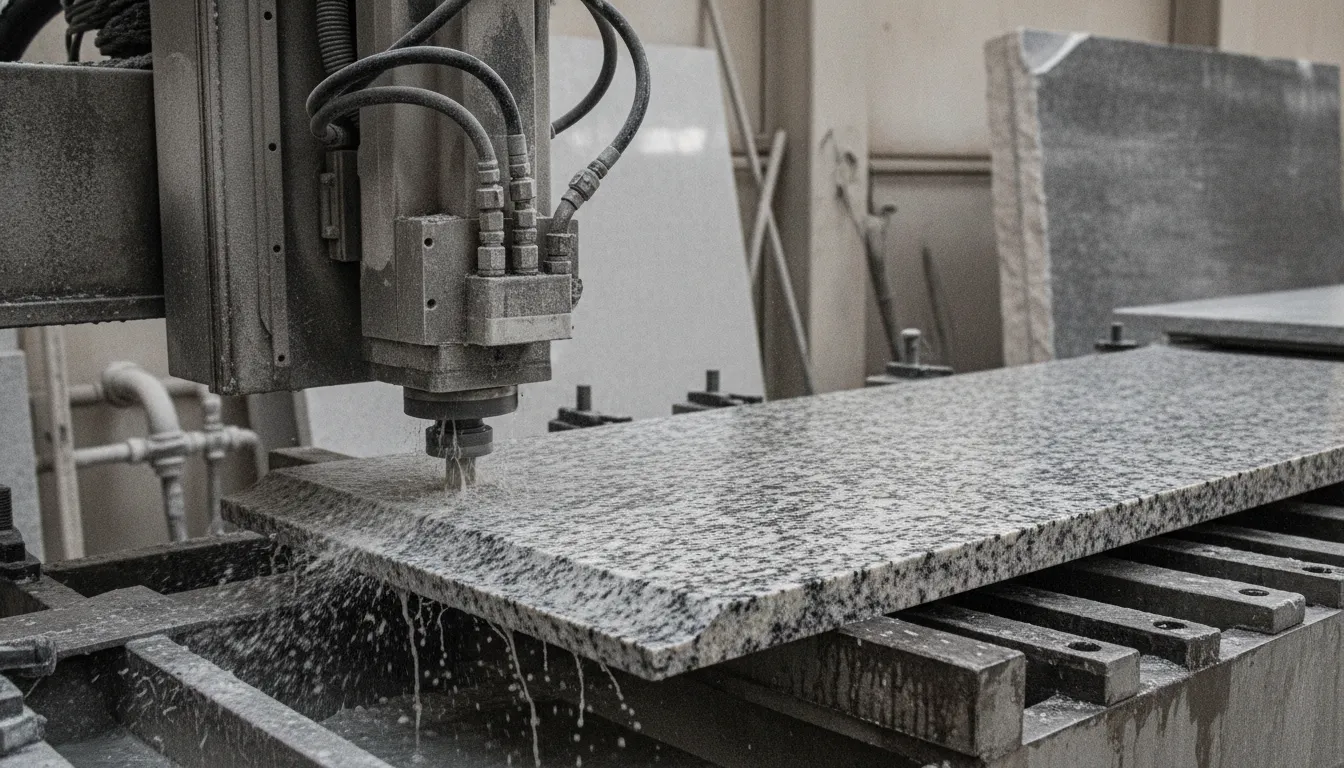
Long tool life starts with controlling the cut, not simply buying a more expensive bit. Keep the tool cool, move chips out of the cutting zone, watch the edge as the job runs, and change a bit before wear turns into visible chipping. Wet cutting is often the practical choice for granite fabrication because water helps manage heat and flush debris from the working area. It also supports better silica-dust control when the process and containment are set up correctly. NIOSH identifies wet methods as effective for respirable silica control, but water does not replace proper shop safety procedures.
Keep coolant moving through the cut
Set the coolant stream so it reaches the contact point rather than simply wetting the top of the slab. Adequate flow carries granite fines away from the diamonds and reduces the chance that debris will recut against the tool. Watch for a weak or interrupted stream, clogged lines, or slurry collecting around the profile. These conditions can increase friction, heat, and bond glazing. If the machine uses a recirculating system, maintain the tank and filtration so abrasive sediment does not become part of the coolant.
Inspect the edge and the tool between jobs
Granite is not uniform. Mineral composition, density, fissures, and inclusions can vary within the same slab, so one section may wear a tool faster than another. Research on granite machining has linked material heterogeneity with tool wear. Check the finished edge for rising chip-out, waviness, burning, or a profile that is no longer holding its shape. Inspect the diamonds, bond, shank, and runout after a difficult pass. A glazed cutting surface, unusual vibration, or rising spindle load is a reason to pause and diagnose, not simply push harder.
Use conservative tool changes when edge quality matters. Record the material, operation, tool, coolant condition, and observed wear. Replace or recondition the bit when it can no longer meet the required finish, even if it still appears capable of removing material. A short test pass on scrap or an edge that will be trimmed can confirm the change before the production piece is exposed.
A Practical Buying Checklist for Granite Fabrication Shops
Start with the operation, not the product name. A profile bit for a bullnose edge has a different job from a core bit for faucet holes, even when both are used on the same granite slab. Write down the cut or finish, the granite type, the required edge profile, and whether the pass is roughing, shaping, or finishing.
- Match the geometry to the operation: choose profiling or bullnose tooling for edge shape, router tooling for shaping and detail, core tooling for holes, and engraving tooling for shallow lines or lettering.
- Choose the abrasive and bond: diamond is the normal starting point for sustained granite contact. Compare sintered and electroplated options based on stock removal, finish, coolant, and the tool maker's application guidance.
- Confirm the interface: verify shank or thread, diameter, usable length, collet size, machine clearance, and coolant delivery before ordering.
- Plan the first pass: use the manufacturer's feeds-and-speeds chart, then validate with a controlled test pass on scrap or a low-risk portion of the slab.
- Protect the tool: keep water and chip evacuation consistent, watch for glazing or abnormal wear, and document the settings that produce a clean edge.
For broader equipment decisions, read Diamond Tool Store's general CNC tooling selection guide. This article goes further into bit geometry, tooling materials, compatibility, and operating setup so your purchase is tied to a specific fabrication result.
Frequently Asked Questions
What is the best CNC bit for granite edge profiling?
Use a diamond profile or bullnose bit built for the edge shape you need. Match the tool radius and working diameter to the finished profile, then confirm the shank, spindle limits, coolant method, and recommended feeds before cutting. A roughing profile tool can remove stock, while a finishing profile tool helps refine the edge before polishing.
Are diamond router bits suitable for granite CNC work?
Diamond router bits can suit granite pocketing, edge preparation, localized flattening, and controlled stock removal when the tool is rated for the application. Select the diameter and working length for the toolpath, use the maker's starting parameters, and leave enough material for the finishing pass. Do not substitute a router for a profile bit when the edge contour must be formed accurately.
Should I choose sintered or electroplated diamond tooling?
Sintered diamond is often considered for demanding stock removal because its bond holds diamond through the working surface. Electroplated tooling can fit detail, profiling, or specialized applications that benefit from concentrated exposed diamond. The better choice depends on the operation, granite, finish, coolant, expected duty cycle, and the tool maker's application guidance.
How do I choose a CNC bit shank for my granite machine?
Match the shank diameter, thread, shoulder, and mounting format to the machine's collet, holder, arbor, or tool-change system. Also compare the cutting diameter, overall length, working length, and clearance around the spindle and fixture. If the product specification does not clearly match your machine documentation, resolve that compatibility question before ordering.
What feeds and speeds should I start with for granite CNC tooling?
Start with the manufacturer's chart for the exact tool, operation, granite, and machine. Run a controlled shallow test pass, watch for chatter, heat, edge breakout, glazing, and spindle-load changes, then adjust one variable at a time. There is no universal setting for every granite CNC bit because rigidity, coolant, tool geometry, engagement, and stone properties all change the cut.
Ready to choose CNC tooling for granite fabrication?
The right bit depends on the operation, granite, machine interface, cutting conditions, and finish standard. Review those factors before ordering so the tool you select supports a stable cut and a predictable fabrication result.
Shop CNC tooling for granite fabrication at Diamond Tool Store