Removing tile is only the first phase of a flooring replacement. Once the tile is up, the slab may still be covered with thinset ridges. Adhesive residue, dust, and small divots that can telegraph through the new floor or weaken its bond. Treat the concrete as a substrate that needs inspection and correction, not as a finished surface.
Concrete floor preparation after tile removal means mechanically removing remaining thinset and adhesive, vacuuming the slab. Repairing cracks and low spots, checking moisture, and leveling the surface to the new flooring manufacturer's tolerance. Grinding can also open the concrete's pores to create a better mechanical key for primer, leveling compound, or adhesive.
Work in that order so each step supports the next. A clean, sound, properly profiled slab gives patches and leveling products a reliable surface, while moisture testing helps identify conditions that could compromise the flooring system later. Start by confirming that no thinset or adhesive remains to interfere with the bond.
Shop diamond grinding tools and cup wheels for concrete floor prep
Why You Must Remove All Thinset and Adhesive First
After tile removal, the slab may look ready for the next flooring system, but a thin film of mortar or adhesive can still compromise the installation. Do not treat leftover material as harmless residue. It can leave the substrate uneven, interfere with the chemistry of the new bonding system, and create a failure point beneath the finished floor.
Start by identifying whether the remaining material is loose, bonded, soft, brittle, or spread across the entire slab. Scrape raised ridges and remove material that does not have a firm bond. Stubborn thinset generally requires mechanical removal rather than repeated attempts to dissolve or cover it. The objective is a sound, clean concrete surface that is suitable for the primer, patch, leveling compound, or flooring adhesive specified for the new system.
Uneven residue creates high spots and weak areas
Thinset ridges and adhesive patches change the plane of the floor. A new finish may bridge those high spots while leaving voids or low areas around them. That unevenness can telegraph through resilient flooring, interfere with tile coverage, or force a leveling product to work beyond its intended thickness. Even when the finished floor looks acceptable at first, concentrated pressure on an unsupported area can contribute to cracking, movement, or premature wear.
Do not rely on a quick sweep to judge flatness. Use a straightedge across the slab and mark ridges, depressions, and areas where old material remains tightly bonded. Remove the raised residue before deciding whether the remaining imperfections need patching or a self-leveling product.
Old adhesive can conflict with the new bonding system
Old adhesive is more than a physical obstruction. Its chemistry may not be compatible with a new adhesive, primer, or leveling compound. Residual material can react with the new product or prevent it from wetting and gripping the concrete as intended. That incompatibility can lead to poor adhesion and installation failure, even when the new flooring material and installation technique are otherwise correct.
Bonding also depends on the condition of the concrete below the residue. Mechanical removal exposes a more consistent substrate and can create the porous surface needed for primers, leveling compounds, and new flooring adhesives to develop a mechanical key. Remove the old layer first, then vacuum the dust and debris so contaminants do not sit between the concrete and the next product.
Thorough removal is therefore a risk-control step, not cosmetic cleanup. If a section remains questionable, keep testing and removing material until the slab is stable, reasonably even, and compatible with the flooring system manufacturer's preparation requirements.
The Right Tools and Safety Gear for Concrete Preparation
Tool selection should follow the condition of the slab and the size of the work area. A few square feet of stubborn thinset may respond to a floor scraper and hand grinder. A whole room with ridges, adhesive residue, or uneven areas usually calls for a more systematic combination of scraping, scarifying, and grinding. The goal is not simply to make the concrete look cleaner. Mechanical preparation removes residue and creates a surface that can accept primer, leveling compound, or a new flooring adhesive.
Match the machine to the residue and floor area
Start with a floor scraper or powered stripper when the remaining thinset is thick, loose, or raised above the slab. Scraping takes off the bulk of the material before you bring abrasive tooling into the process. It also reduces the amount of dust and wear placed on the grinder. For thinset that remains bonded after scraping, a scarifier can cut more aggressively into the surface and remove heavier contamination. Use it carefully, since excessive removal can leave deep grooves that require additional correction.
Walk-behind grinders are a practical choice for open rooms and larger slabs. A planetary grinder can cover broad areas while producing a more consistent profile, which helps when the new floor requires uniform preparation. For edges, corners, steps, and isolated ridges, use a hand grinder fitted with a diamond cup wheel. Diamond cup wheels are effective for stubborn thinset, and hand-held or walk-behind grinders can both work well when matched to the scale of the job.
Review the available high-quality diamond grinding wheels before choosing a bond and grit. The right wheel depends on the concrete hardness, the residue left on the slab, and the finish or profile required by the flooring system. If you are comparing blades, cups, and other options, use this guide to choosing the right diamond tools. You can also browse the broader range of diamond tooling for equipment that fits your grinder and application.
Control dust before it reaches the work area
Dry grinding concrete can produce fine dust that travels well beyond the immediate work zone. Connect the grinder to a suitable dust extractor, keep the shroud seated against the floor, and replace or clean filters before airflow drops. Use barriers and, where appropriate, local ventilation to protect adjacent rooms. Avoid sweeping dust back into the air after grinding. Vacuum the slab and surrounding surfaces with equipment designed for fine dust, then inspect the floor under good lighting before moving to patching or bonding.
Wear PPE for every removal method
Wear a properly selected dust respirator, eye protection, hearing protection, work gloves, durable footwear, and clothing that covers exposed skin. Scrapers and scarifiers can throw chips, while grinders create both airborne dust and high noise levels. Check the tool guard, wheel, power cord, and extraction connection before use. Keep bystanders clear of the work zone, and follow the tool manufacturer's instructions for wheel speed, pressure, and compatible accessories. A controlled setup protects the operator and leaves a cleaner substrate for the next stage of concrete floor preparation after tile removal.
How to Approach Concrete Floor Preparation After Tile Removal
Once the tile is gone, the slab still carries the installation history of the old floor. Thinset ridges, adhesive film, and loose mortar can leave high spots, trap dust, and interfere with the next bonding system. Mechanical removal gives you a clean, consistent surface without relying on solvents that may leave residue behind.
- Inspect and remove loose material first. Walk the slab and mark raised ridges, hollow-sounding areas, and adhesive patches. Use a stiff floor scraper, chisel, or suitable stripping tool to lift anything that is already loose. Work from the edge of each deposit instead of grinding immediately over thick, flaky material. This first pass reduces the load on the grinder and exposes the bonded residue that needs more aggressive tooling.
- Choose the machine for the size of the area. A hand grinder with a diamond cup wheel can address edges, corners, stubborn spots, and smaller rooms. Larger floors are usually more efficient with a walk-behind or planetary grinder. Diamond cup wheels are effective for removing stubborn thinset from concrete, but match the wheel and machine to the material and the required finish. Keep the work area controlled and use appropriate eye, hearing, respiratory, and foot protection.
- Scarify or grind to clean, sound concrete. Start with the tool moving before it contacts the floor, then work in steady, overlapping passes. Do not linger in one place, because aggressive grinding can create an unnecessary dip in the slab. Continue until the remaining adhesive and thinset are removed rather than stopping when the surface merely looks smoother. The goal is bare, sound concrete with a consistent profile that can accept the next material.
- Use cross-passes to check the surface. Change your travel direction on the next pass so shadows and remaining ridges are easier to see. Pay particular attention to transitions, perimeter areas, and places where the tile bed was thicker. A hand grinder can blend the edges of machine passes, but avoid leaving a polished strip beside a heavily abraded field. Uniform preparation matters more than making every area visually identical.
- Vacuum as you go, then make a final cleaning pass. Grinding dust can settle back onto the slab and hide residual mortar. Stop periodically to use a suitable dust-extraction vacuum, and vacuum the entire surface after grinding. Sweep-only cleanup is not enough when dust or debris can block adhesion. The slab should be free of loose particles before primer, patching compound, leveling material, or new adhesive is applied.
Grinding does more than remove visible residue. It opens the surface and creates a porous mechanical key that gives primer, leveling compounds, and new flooring adhesives something to grip. A slab that appears clean but remains dense, dusty, or coated can still produce a weak bond. For a closer look at machine control, pass patterns, and surface results, review these proper concrete grinding techniques.
After the final vacuuming, inspect the slab under strong side lighting. Any remaining glossy adhesive, raised thinset, or loose edge is a reason to return to mechanical removal before moving to repairs or leveling. This sequence, scrape, grind, overlap, and vacuum, establishes the clean substrate required for the preparation steps that follow.
Do I Need to Grind Concrete After Tile Removal?
In most cases, yes. After tile and thinset removal, grinding exposes clean, porous concrete that gives primer, leveler, or new flooring adhesive a mechanical key. The goal is not to polish the slab. It is to remove the remaining bond breakers and leave a sound surface with enough texture for the next material to grip.
This is the central decision in concrete floor preparation after tile removal: determine whether the slab is genuinely clean or only looks clean from a distance. Thinset can remain in shallow ridges, pores, and low areas after scraping. A thin film of adhesive may also leave a smooth or glazed surface. If that residue stays in place, it can interfere with adhesion, create unevenness, or react incompatibly with a new bonding product. Those problems can lead to delamination, cracking, or an installation that fails before the new floor reaches its expected service life.
When lighter surface preparation may be enough
A full grind may not be necessary when the slab is already sound, open, and nearly free of residue. For example, a floor with minimal thinset that releases cleanly under a scraper may need only localized mechanical treatment, followed by thorough vacuuming and inspection. Run a straightedge across the work area and check for raised ridges, glossy patches, friable concrete, and remaining adhesive. If the surface is uniformly clean and has a texture compatible with the primer or adhesive manufacturer's requirements, a lighter preparation approach may be reasonable.
Do not judge readiness by appearance alone. Dust and fine debris can remain after scraping and prevent proper adhesion. Vacuum the slab after mechanical work, then remove any remaining loose material before applying a primer, leveler, or adhesive. The floor should be clean enough that wiping or vacuuming does not reveal another layer of residue.
When a full grind is the safer choice
Use a full grind when heavy thinset remains, the residue is tightly bonded, or the concrete is glazed or coated with paint or another film. A diamond cup wheel on a hand grinder can handle stubborn areas, while a walk-behind or planetary grinder is more practical for larger rooms. Work methodically rather than digging into isolated spots, and use dust control appropriate to the equipment and site.
Grinding is also the safer choice when the slab must accept a cementitious leveler or a new adhesive across a broad area. It creates the porous profile those products rely on for bonding. Once grinding is complete, vacuum carefully and inspect again. The finished surface should be clean, sound, and consistently prepared before the next stage of floor preparation begins.
Patching Cracks, Low Spots, and Divots
Once the tile, thinset, and adhesive are gone, inspect the exposed slab under strong light. Grinding can remove surface residue, but it will not correct every crack, divot, or shallow depression. Those defects need their own repairs before new flooring goes down. A substrate that looks acceptable from a standing position can still telegraph through thin resilient flooring or luxury vinyl after installation.
Repair hairline cracks before they spread into the finish
Start by cleaning each crack thoroughly. Remove loose concrete, dust, and fine debris from the opening so the filler can bond to sound material. A narrow brush and careful vacuuming work for small repairs. Do not leave grinding dust packed inside the crack.
Fill clean hairline cracks with a suitable grout or epoxy filler selected for the slab and the flooring system. Follow the product instructions for mixing, working time, and cure time. The repair should fill the void without leaving a raised ridge. After the filler has set enough to work, smooth it flush with the surrounding concrete. The goal is a continuous surface, not a visible mound that creates another irregularity.
For larger or moving cracks, stop and determine whether the slab has an underlying structural or moisture problem before applying a cosmetic filler. A surface patch cannot stabilize an actively moving joint. Treat joints and significant cracks according to the flooring manufacturer's requirements rather than burying them under a patch.
Patch divots and low spots with compatible repair material
Small divots, chipped areas, and shallow low spots can usually be filled with a compatible patching or repair compound. Cementitious patching materials are commonly used for concrete substrate repairs, but the correct choice depends on the intended flooring, slab condition, and product specifications. Use a material approved for the thickness and application you need.
Spread the compound beyond the damaged area, then feather the edges into the surrounding slab. A hard perimeter or abrupt transition can remain visible beneath resilient flooring. Feathering creates a gradual blend and reduces the chance that the repair will telegraph through the finished surface. Keep the patch as flat as possible, and remove ridges before the material cures.
After the repair cures, scrape or lightly smooth any proud spots and vacuum the area again. Run a straightedge across the slab from several directions. Mark any remaining gaps or rocking points, then correct them before moving to moisture testing, primer, or leveling work. The finished substrate should be clean, firm, and seamless enough that the new floor is not forced to reveal the slab's history.
For additional background on why a seamless substrate matters, review these proper concrete grinding techniques before selecting the repair product.
Testing Moisture Before Installing New Flooring
A clean, smooth slab can still fail if moisture is moving through it. After tile removal, test the concrete before applying adhesive, primer, leveling compound, or a polymer-based coating. Trapped moisture can create vapor pressure beneath the finished floor, weakening the bond, blistering coatings, softening adhesives, or contributing to debonding. The National Institute of Standards and Technology identifies moisture testing as part of determining the moisture condition of hardened concrete. And flooring guidance flags vapor pressure as a critical installation failure point.
Do not treat a dry-looking surface as proof that the slab is ready. Concrete can feel dry at the top while retaining moisture deeper in the slab. The test method you choose should match the flooring system and the manufacturer's requirements.
Use calcium chloride testing to measure vapor emission
A calcium chloride test, also called a moisture vapor emission rate (MVER) test, measures the amount of moisture vapor released from the concrete surface over a defined period. The test is placed on a prepared section of slab and sealed so the collected moisture represents vapor coming through the concrete rather than room humidity. Use the manufacturer's procedure carefully, and test multiple areas when conditions vary across the room.
MVER results help the flooring installer compare the slab with the adhesive or flooring system's published moisture limit. A result above that limit is not a signal to simply add more adhesive. It means the system needs a documented moisture-control plan, which may include delaying installation. Improving site drying conditions, installing a compatible vapor barrier, or applying a moisture-mitigation product approved for the measured condition.
Confirm conditions with in-situ relative humidity probes
Relative humidity probes placed in drilled holes measure moisture conditions inside the slab rather than only at its surface. This can provide a better picture of the moisture available to move upward as the floor is covered. Follow the probe manufacturer's instructions for hole depth, equilibration time, placement, and interpretation. Record readings by location, especially near exterior walls, plumbing, joints, and areas that previously showed staining or adhesive failure.
Moisture matters for more than the finish flooring. Excess water can interfere with adhesive curing and reduce polymer-to-concrete bond performance. Research on polymer overlay bond integrity documents the adverse effect concrete moisture can have on that bond. If results are high, select a vapor barrier or mitigation system that is chemically compatible with the planned adhesive, primer, patch, or coating. Some systems require mechanical preparation before application, so verify the complete product system instead of combining products by guesswork.
Keep the test record with the project notes, including locations, dates, conditions, methods, and results. That information gives you a defensible basis for deciding whether the slab is ready or needs additional moisture control before the new floor goes down.
Leveling and Final Prep Before New Flooring
Once the slab is free of tile, thinset, and loose debris, inspect it under good light and with a straightedge. The goal is not to make every square inch look new. The goal is to create a sound, clean plane that matches the requirements of the flooring and adhesive system you will install.
Use the moisture result from the previous section to guide the next move. If the reading is within the flooring manufacturer's limit, continue with surface correction. If it is too high, stop and address the moisture condition before covering the slab. Leveling compound does not solve vapor pressure, and installing over a wet substrate can compromise the bond of polymer-based flooring systems. Follow the product data sheet for the exact moisture limit and primer requirements.
Choose the prep method for the condition of the slab
After debris removal, select the least aggressive method that will produce the required result. Mechanical surface preparation guidelines emphasize removing contaminants and preserving bond integrity. A self-leveling product is useful when broad, shallow imperfections remain. Manual patching is better for isolated divots, edges, and small transitions. Grinding alone can remove high spots and residue, but it will not fill depressions.
| Prep option | Effort | Result | Best use |
|---|---|---|---|
| Self-leveling compound | Moderate; requires mixing, priming, placement, and cure time | Broad correction that flows into low areas and forms a consistent plane | Widespread shallow lows after the slab has been cleaned and mechanically prepared |
| Manual patch and skim | Low to moderate; more hands-on work at each defect | Controlled repairs with minimal material outside the damaged areas | Small divots, isolated low spots, cracks, and edges that do not justify a full pour |
| Grinding only | Moderate to high; dust control and careful machine handling are essential | Removes high spots, residue, and surface contamination but does not raise low areas | Raised ridges, remaining thinset, and localized high areas before patching or leveling |
Apply, screed, and let the repair cure
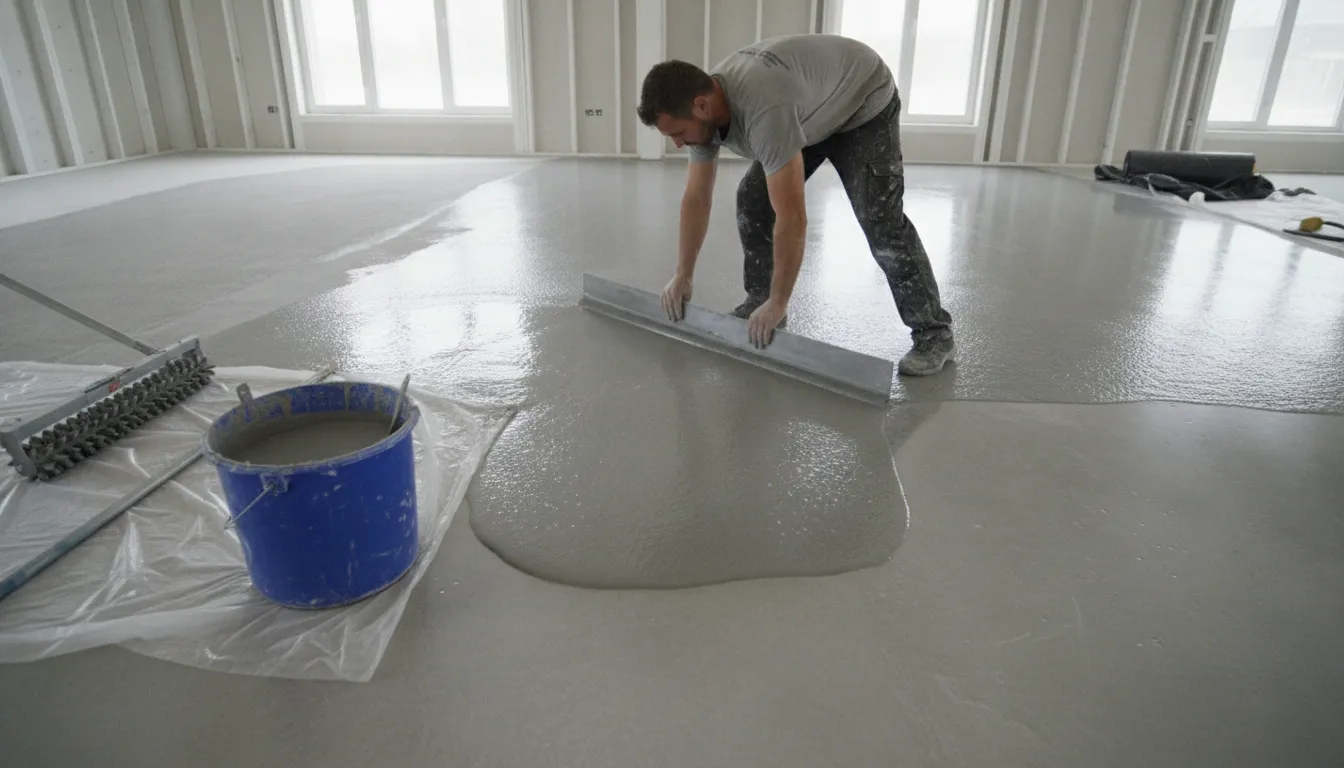
Before applying a leveling compound, vacuum the slab thoroughly. Fine grinding dust can interfere with the primer and prevent the compound from bonding to the concrete. Prime the surface with the product specified by the compound manufacturer, then mix only the amount you can place within its working time. Pour or spread the material into the prepared area and use a gauge rake or suitable tool to distribute it. Screed the surface to a smooth plane, paying attention to doorways, transitions, and the perimeter.
Do not rush the next installation step. Protect the area and allow the compound to cure for the time stated in its technical data. Temperature, humidity, thickness, and airflow can change the cure time. A surface that feels hard at the top may still retain moisture below. Confirm readiness using the manufacturer's instructions rather than relying only on appearance.
Finish with a clean, primed substrate
After the repair has cured, scrape or lightly abrade any ridges, then vacuum again. The final surface should be dry, solid, smooth where required, and free of dust, loose particles, and visible residue. Vacuuming after grinding and before bonding or leveling is a necessary part of producing a clean substrate. Apply the flooring system's primer if its instructions call for one, and let it dry or cure fully before installing the new floor.
Get the grinding and scarifying tools you need for a clean, level slab
Frequently Asked Questions
What is the best way to prepare a concrete floor after removing tiles?
Remove loose mortar and adhesive with a scraper, then grind remaining thinset or high spots. Vacuum the slab thoroughly, repair cracks and low areas, test for moisture, and apply primer or leveling material as required by the flooring system. This sequence leaves a clean, consistent substrate for the next installation.
How do I remove residual thinset from a concrete slab?
Start with a floor scraper for loose or raised material. For stubborn thinset, use a hand grinder fitted with a suitable diamond cup wheel, or a walk-behind grinder on larger areas. Control dust with appropriate collection equipment and vacuum the surface when grinding is complete. A diamond grinding wheel can help expose clean concrete efficiently.
Do I need to grind concrete after tile removal?
Usually, yes, if thinset, adhesive, paint, or other contaminants remain. Grinding removes residue and opens the surface to create a mechanical key for primers, leveling compounds, and flooring adhesives. If the slab is already clean, sound, and suitably profiled, only localized grinding or light preparation may be necessary.
How should I repair cracks and low spots before new flooring?
Clean each crack and divot so dust and loose concrete do not weaken the repair. Fill suitable hairline cracks with an appropriate grout or epoxy filler, then smooth the repair flush with the surrounding slab. Correct broader low spots with a compatible patching or self-leveling compound, following the product instructions.
How do I know when the slab is ready for flooring?
The slab should be free of dust, debris, loose adhesive, and unsound repairs. Confirm that patched areas are cured and the surface is within the flatness limits for the selected flooring. Complete the required moisture test before installation, because moisture and vapor pressure can compromise flooring bonds. NIST describes methods for determining moisture conditions in hardened concrete: NIST moisture testing guidance.
Ready to Finish Your Concrete Floor Preparation?
A properly prepared slab gives your new flooring a cleaner, more reliable surface to build on. Stock your kit with the right tooling for removing stubborn thinset and refining concrete before the next installation step.
Shop professional diamond grinding wheels and tooling for concrete floor prep