In a professional stone shop, the right work table does more than hold a slab. It keeps the work supported while operators route, grind, polish, and complete sink cutouts. The table should not introduce movement, awkward height, or limited floor space.
The best stone fabrication work table is sized for your heaviest realistic slab and tooling load, with stable support across the work area. It also needs a surface that protects finished stone, useful height adjustment, and mobility only where it improves the workflow. The safest choice fits your slab-handling process, including staging, transfer points, brakes, and clear space around the table.
Shop tables and stands for stone fabrication
Start by looking past a table's overall dimensions. Load rating, support layout, surface protection, adjustability, and movement each affect repeatability, maintenance, and safe slab handling. The first step is matching those features to the work your shop actually performs.
What Makes the Best Stone Fabrication Work Table?
The best stone fabrication work table is not simply the largest or heaviest table in the shop. It is a stable, well-supported work surface that matches the slabs you handle, the fabrication tasks you perform, and the way material moves through your workspace. A good table supports cutting, polishing, assembly, repair, and finishing while keeping the work positioned at a practical height.
Start by defining the work the table must support. A shop that mainly completes sink cutouts and edge finishing may need a different support layout than a shop that stages full slabs for repeated cutting and polishing. Review the table length and width against your typical slab sizes, the clearance needed for tools, and the space required for operators to work without reaching across unstable material. The table should support the work without forcing you to improvise with loose blocks, uneven stands, or crowded adjacent equipment.
Stability is the first buying criterion
Stone is unforgiving of movement. A frame that flexes, rocks, or shifts under working pressure can make layout and finishing less consistent. Look for a base that sits securely on your floor, support points that distribute the slab load, and hardware that can be inspected and maintained. If the table rolls, verify that the casters lock firmly before fabrication begins. Mobility is useful for staging and cleanup, but a rolling table still needs to behave like a stationary work surface while a cut, grind, or polish is underway.
Working height affects control and fatigue
Work height should fit both the operators and the task. A surface that is too low encourages bending and awkward tool angles. One that is too high can make it harder to control a grinder or reach the work comfortably. If several operators share the table, adjustable height may provide a better fit than a fixed frame. Also account for the thickness of pads, fixtures, rails, or protective material added above the tabletop. The usable working height is the height at which the stone and tool actually meet, not just the published frame height.
Protect the slab and fit the workflow
Contact surfaces should support the material without creating avoidable point pressure or scratches. Consider whether the table provides continuous support where needed, enough edge support for the workpiece, and a surface that can tolerate water, slurry, and routine cleanup. Replaceable protective layers can also help separate finished stone from a rough frame, but they must stay flat and secure.
Finally, place the table in the workflow rather than treating it as an isolated purchase. Map the path from storage to table, then from fabrication to polishing, inspection, and loading. The stone fabrication shop equipment guide can help identify related equipment, while the tables and stands collection gives you a starting point for comparing configurations. The right choice balances support, access, protection, and movement so the table improves repeatable shop work instead of becoming another obstruction on the floor.
How Much Load Rating Does Your Work Table Need?
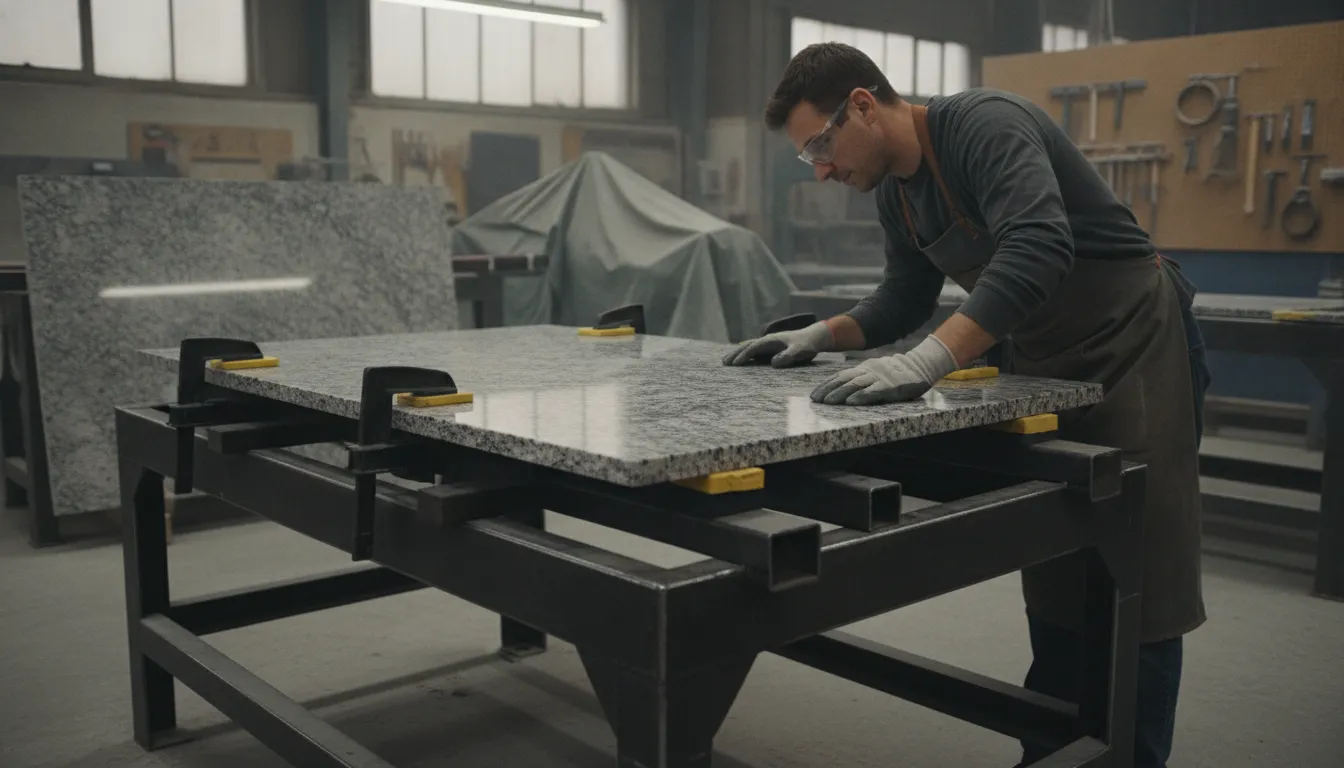
Choose capacity from the heaviest realistic working setup, not from the slab alone. A professional fabrication table may carry a slab or countertop section, tooling, water, clamps, sink-cutout fixtures, protective pads, and the force created while routing, grinding, or polishing. Add the people who may lean against the surface or steady a piece during a task. The table should remain stable and level throughout that work, with a margin beyond the calculated working load.
Stone weight can vary dramatically. OSHA notes that rock slabs may weigh from hundreds of pounds to a few thousand pounds. So a table suitable for small countertop sections may be completely unsuitable for full-slab work. The relevant question is not simply whether the tabletop can hold the load while still. Consider how the weight is distributed, where the supports sit, and what happens when a slab is moved onto the table or repositioned.
Published product listings provide useful context, but they are examples rather than Diamond Tool Store product claims. For instance, one listed fabrication table example is 79 by 24 by 42 inches with a 1,000-pound capacity, while a listed table dolly example carries 1,200 pounds. Those figures show why capacity must be matched to the equipment's intended role. A dolly designed for transfer is not automatically a substitute for a fabrication table during cutting or polishing.
Build a realistic working-load estimate
- Slab or workpiece: Start with the maximum material size and weight your shop regularly handles, including dense granite, marble, quartz, or assembled sections.
- Tools and fixtures: Include grinders, routers, water-management equipment, clamps, sink templates, supports, and any permanently mounted accessories.
- People and working force: Account for operators leaning, bracing, or guiding the piece. Dynamic loading during placement and repositioning can exceed the quiet, evenly distributed load.
- Support pattern: Confirm the rated capacity applies to your actual span, contact points, and overhang. A concentrated load near an edge can stress a frame differently from a centered load.
- Movement: If the table rolls, tilts, or interfaces with a lift, verify the rating for that operating position and for transitions between surfaces.
Before buying, ask for the rated static load, the permitted load distribution, and any reduced rating for casters, tilt mechanisms, extensions, or uneven floors. Also verify that the table's footprint fits the slab and leaves room for safe positioning. OSHA warns that stone loads can shift and tip during loading, transport, and unloading. Capacity is therefore only one part of the decision. The frame, brakes, supports, and handling procedure must work together for the best stone fabrication work table in your shop.
Which Surface and Support Layout Protect Stone?
The contact surface is where a fabrication table either protects a slab or creates new risks. Stone needs broad, predictable support while it is being cut, routed, ground, polished, assembled, or repaired. A table that looks sturdy but concentrates pressure at a few points can allow flexing, rocking, or edge damage. Start by mapping the work you actually perform. Then choose a surface and support layout that keeps the slab stable without interfering with tools, water, or access around the edge.
Steel and galvanized surfaces are useful concepts when durability and routine shop exposure matter, but the finish alone does not determine whether a table is suitable. Galvanized construction may help address corrosion concerns, while a steel frame can provide a rigid foundation. Verify the actual finish, contact material, drainage approach, and care instructions for any specific product. Diamond Tool Store is a master distributor, so product specifications should be confirmed on the individual listing rather than assumed from a category name.
| Concept. | What it can support. | What to verify before buying. |
|---|---|---|
| Steel contact or frame. | Rigid support for repeated shop work and heavy fabrication tasks. | Contact protection, frame stiffness, edge support, and rated capacity. |
| Galvanized construction. | Durability planning where water exposure and routine cleanup are part of the workflow. | Which components are galvanized, how water drains, and how damaged finish is maintained. |
| Insert or padded contact points. | A replaceable or softer interface between the slab and the supporting structure. | Insert material, spacing, replaceability, grip, and whether it leaves a flat working plane. |
| Protected contact surface. | Reduced direct contact with hard metal during positioning, cutting, and finishing. | Coverage, thickness, cleanability, chemical resistance, and protection at corners and edges. |
Continuous support matters more than a crowded-looking frame
For large slabs, aim for support that follows the workpiece rather than isolated points that leave long unsupported spans. Gaps can be useful for tool clearance or debris management, but they should not sit beneath a fragile overhang, sink cutout, narrow strip, or unfinished edge. Check whether the table supports the slab near its perimeter and through the main working area. If a design is modular, confirm that modules can be positioned to match the slab size and the cutout location.
Plan for water, edges, and sacrificial protection
Wet cutting and polishing change the support problem. Water, abrasive slurry, and stone dust need a cleanup plan that does not leave the slab sitting in contaminated runoff. Look for practical drainage and access, then ask how the contact surface will be dried and maintained. Use sacrificial pads, inserts, or other approved protection where the work requires it, and replace them when they become compressed, torn, contaminated, or uneven. Protecting the contact surface is not a substitute for careful slab positioning. It works alongside adequate perimeter support, a stable base, and a layout that keeps tools and clamps from loading a vulnerable edge.
Review the available tables and stands by surface, support pattern, and intended workflow. The best fit is the one that keeps the stone supported and protected through the entire job, not merely the one with the most visible steel.
Why Adjustability and Ergonomics Matter in a Fabrication Shop
A fixed-height table can be a dependable choice when the same operator performs similar work at the same position every day. It is simple, stable, and easy to place in a dedicated fabrication area. The limitation appears when operators differ in height, or when the job changes from layout and assembly to sink cutouts, routing, grinding, or polishing. A surface that feels workable for one task may force another operator to reach, bend, or raise the shoulders.
That is why height should be evaluated as part of the table's workflow fit, not as an isolated specification. NIOSH advises that most work should be performed at about elbow height. It also notes that an inappropriate work-table height can add unnecessary stress to the back, shoulders, and neck. Read the NIOSH guidance on adjusting workstations when establishing the working position for your shop.
When is a fixed-height table the right fit?
Fixed height is often practical when the table is assigned to a defined operation and the operator group is relatively consistent. It can also make sense when the surrounding equipment, water management, and material-transfer path are already built around one working level. Before choosing it, have the primary operators stand at the proposed surface and simulate the actual motions. Check the reach to the slab edge, the clearance for tools, and whether the operator can maintain a neutral posture without leaning across the material.
What does an adjustable table add?
An adjustable table gives the shop more control when people and tasks vary. The research examples include a tilt table adjustable from 36 to 42 inches and rated for 600 pounds. As well as a fabrication stand with the same 36-to-42-inch height range. Those are examples of market offerings, not specifications to assume for every table. Verify the adjustment range, load rating, locking method, and surface dimensions for the exact model under consideration.
Use a lower working position when the task requires forceful downward work or close control near the slab surface. A higher position may reduce stooping during layout or finishing tasks. The best setting also depends on slab thickness, tooling, and whether the operator needs clear access to an edge or cutout. Adjustability should therefore improve fit without compromising stability. If height is modified with blocks or other supports, NIOSH warns that wood blocks should be secured to one another and to the table legs to prevent instability. Never treat an improvised spacer as a substitute for a properly secured adjustment system.
For a professional shop, the best stone fabrication work table lets each operator reach the work comfortably. It preserves stable support and a predictable transfer path. Compare height range and locking security alongside capacity, footprint, and the tasks the table must support.
When Should You Choose a Mobile or Tilting Table?
The right table depends on how often slabs move through your shop, where fabrication happens, and how many transfer points your workflow creates. A stationary table is usually the straightforward choice for a dedicated cutting, routing, grinding, or polishing position. It gives you a fixed reference point and keeps the surrounding layout predictable. Choose this format when slabs arrive at the table through separate lifting or transport equipment and the table does not need to travel between workstations.
A rolling table makes more sense when the same supported slab must move between fabrication stages. Casters can help you reposition the table without unloading the workpiece. Mobility is useful only when the wheels are suited to the floor and the table can be secured before work begins. Confirm that the casters have reliable brakes, that the locked table remains stable under the intended load, and that aisles, doorways, drains, and nearby equipment leave enough clearance for the complete table footprint.
Match the table to your staging and transfer points
Map the slab's path before choosing a mobile design. Identify where the slab is unloaded, staged, supported, fabricated, inspected, and transferred to the next operation. A mobile table may reduce one lift. Yet create a new problem if the operator must push it across an uneven threshold or turn it in a narrow aisle. Keep transfer points as level and direct as possible. The table should not become a substitute for equipment designed to lift, position, or transport a slab.
For shops that change layouts or handle workpieces of different sizes, a modular setup can provide more flexibility than one fixed footprint. Modular supports can be arranged around the job and stored when floor space is needed. They still require a stable support pattern, a clear load path, and a secure connection between components. Treat every change in configuration as a setup check, not as an assumption that the previous arrangement remains safe.
When does tilting add value?
A tilting table is useful when changing the slab's working angle reduces reaching, improves access to an edge, or makes a particular fabrication task easier to control. It should be selected for a repeatable process, not simply because it offers another adjustment. Plan where the table will tilt, how much clearance the motion needs, and where the slab's center of gravity moves during the adjustment. Keep personnel clear of pinch and transfer zones, and verify the table is secured before cutting or finishing.
A lift table is complementary rather than interchangeable. Wheeled scissors lifts and other lift tables can transfer items between work surfaces while minimizing manual handling. They can also serve as temporary work surfaces at an appropriate height. Pair that equipment with a dedicated work table when your process includes frequent elevation changes or handoffs. Review Diamond Tool Store's material handling equipment and guide to material handling carts for slabs alongside the table decision. The best stone fabrication work table fits the entire movement plan, not just the moment when the slab is on its surface.
Safe Slab Handling Around the Work Table
A work table is only one part of a safe slab workflow. Granite, marble, quartz, and other stone slabs can weigh from hundreds to a few thousand pounds. Positioning the material therefore requires a planned process rather than improvised pushing or lifting. OSHA identifies hazards connected with handling and transporting granite and marble slabs. These include shifting loads, tipping, struck-by incidents, and caught-between injuries. Use this checklist as a practical shop review. Align it with your documented safety procedures and applicable requirements. Review OSHA's slab-handling hazard guidance before establishing or revising your process.
- Plan the route and work zone before moving the slab. Clear the path from storage to the work table, identify transfer points, and remove unnecessary tools, hoses, pallets, and debris. Mark or communicate the area where a slab could shift or fall. Keep nonessential personnel outside the movement and positioning zone. A clean route reduces last-second corrections when visibility, clearance, or footing changes.
- Confirm the table and handling device are suited to the task. Check the table's published capacity, footprint, support layout, and stability against the slab and the equipment used to position it. Do not treat a fabrication table as a substitute for a slab cart, lift, rack, or other purpose-built device. OSHA emphasizes that transportation devices must be properly designed and maintained. Inspect contact points, frames, wheels, brakes, straps, controls, and other components before use. Remove damaged equipment from service until it is evaluated and repaired.
- Use trained personnel and a defined communication method. Employees should be trained in the shop's rock-slab handling procedures, including who directs the move, where each person stands, and which commands or signals stop the operation. Do not assume that experience with smaller pieces transfers to full-size slabs. Pause the move if the team loses sight of the load, the route becomes blocked, or anyone is unsure of the next step.
- Control shifting and tipping during loading, transport, and unloading. Loads can shift or tip at each of these stages. Keep slabs secured using the method specified for the equipment and operation. Move at a controlled pace, avoid abrupt turns or stops, and verify that the receiving surface is ready before transferring the load. Storage racks are commonly A-frame structures, and slabs may be transported vertically on racks strapped to a truck bed. The rack design, restraints, and condition must match the handling method.
- Stay out of crush zones and never place yourself between hazards. Workers can be caught between slabs or struck by shifting and falling slabs. Do not stand in the line of a potential fall, between a slab and the table, or between moving equipment and a fixed object. Keep hands and feet clear while aligning the material. Use suitable positioning aids instead of reaching into a narrowing gap, and stop the operation if the slab begins to lean, slide, or settle unpredictably.
- Recheck stability before cutting, routing, grinding, or polishing. Confirm that the slab is fully supported, cannot rock or migrate, and will remain controlled as material is removed. Keep the surrounding floor clear, maintain the table and devices through scheduled inspections, and document training or corrective actions according to your shop's system.
Explore material handling equipment for safer slab movement and staging
Frequently Asked Questions
What should I check before buying a stone fabrication work table?
Confirm the table's rated capacity, working dimensions, support spacing, contact surfaces, height range, and mobility system. Compare those details with your heaviest slabs, common sink cutout sizes, available floor space, and the tools used during cutting, routing, grinding, and polishing. Verify the manufacturer's specifications rather than estimating capacity from appearance.
Is a tilting table better than a stationary fabrication table?
It depends on the work sequence. A stationary table can provide a consistent platform for repeatable fabrication, while a tilting design may improve access when positioning, inspecting, or working on a slab at an angle. Choose a tilt mechanism only when its locking system, operating clearance, and rated capacity fit your shop's handling process.
How high should a stone fabrication work table be?
Set the work surface near the operators' elbow height for the primary task, then check whether the height supports safe tool control and clear sightlines. NIOSH notes that most work should be performed at about elbow height and warns that an inappropriate height can stress the back, shoulders, and neck. See the NIOSH workstation guidance for adjustment considerations.
Can a fabrication table replace a slab cart or lift table?
No. A fabrication table supports the slab during shop work, but a cart or lift table is designed for transport, staging, or transfers between surfaces. Using complementary equipment can reduce manual handling and keep transfer points controlled. Make sure each device is properly rated, maintained, and used by trained employees. OSHA specifically highlights those requirements for granite and marble slab handling.
Ready to Choose the Right Work Table?
Your table should match the slabs, tools, operators, and floor layout your shop uses every day. Reviewing the available support and handling options can help you compare stability, adjustability, mobility, and workflow fit before you commit to a setup.