Seam-setting decisions affect more than the final joint. They shape how quickly a crew can prepare, how much adjustment the operator controls. And whether the same setup makes sense for an occasional installation or a steady production schedule. The right choice depends on the seam geometry, available workspace, slab access, crew familiarity, and the number of seams your shop handles.
For most buyers, manual vs automatic seam setter is a question of control versus repeatability. A manual model can give the operator direct, incremental adjustment with a compact setup that is easy to move between work areas. An automatic or assisted model can help standardize repeated alignment tasks, especially when a crew regularly handles miter joints, waterfall edges, or higher project volume. Neither option is automatically better: compare setup time, suction-cup access, adjustment method, portability, maintenance, and the type of seam before choosing.
A manual tool may be the practical fit when each job is different and the installer needs to feel and correct the joint as it comes together. An automatic setup may earn its place when consistent process matters across multiple crews or repeated countertop work. In both cases, the seam setter supports alignment and helps manage lippage; it does not replace safe slab handling or a properly prepared seam.
Shop countertop support systems for seam-setting equipment
Before comparing actuation methods, it helps to define the tool's role on the countertop. That foundation makes the later tradeoffs around control, repeatability, and production volume easier to evaluate.
What Does a Seam Setter Do on a Countertop Job?
A seam setter is a temporary alignment tool used after adjoining countertop pieces have been positioned and before the seam adhesive has cured. Its suction cups attach to the slab surfaces on either side of the joint. The adjustment mechanism then helps draw the pieces together and bring their top surfaces into the same plane. That can reduce visible lippage and give the installer better control while the joint is being finalized.
The tool is part of the joining process, not a replacement for accurate fabrication, dry fitting, or careful surface preparation. The slabs still need compatible edges, a properly prepared seam, and stable support beneath them. A seam setter can help manage the final relationship between the pieces, but it cannot correct a badly cut edge or compensate for an unstable cabinet run.
Which seam geometries can it help align?
Seam setters are used across several countertop configurations, provided the tool can reach both surfaces and its contact points suit the job. Common applications include:
- Miter joints: The tool can help bring two angled edges together, including the mitered apron or edge detail on an island.
- Butt-joints: On a straight seam, controlled joining and leveling can help keep the adjoining slabs flush as the joint is assembled.
- Compound and inside corners: These require more attention to access and tool placement. A setter may help, but the geometry can limit where cups or adjustment hardware can sit.
- Waterfall edges: A vertical leg meeting a countertop through a miter joint benefits from controlled alignment. The setter must be positioned so it supports the joint without obstructing the installer or stressing the pieces.
Manual and automatic designs can be offered for different seam geometries. The right choice depends on access, slab size, joint design, and how much operator adjustment the crew wants during installation. Smaller suction cups can be useful around smaller pieces or tighter spaces, but cup size should be matched to the surface and the available working room.
How is alignment different from slab handling?
Alignment begins after the pieces are in position. Moving a large, heavy slab into the work area is a separate material-handling task that may require a slab lifter, forklift attachment, overhead crane, or additional trained personnel. Do not use a seam setter as a lifting device or as a substitute for proper slab support.
Plan the handling route first, keep slabs secured and stored vertically when appropriate, and keep people clear of unstable loads. Once the pieces are safely supported, a seam setter becomes a controlled finishing aid. Review the stone fabrication shop equipment and compare countertop support systems when building a workflow around these separate jobs.
How Does a Manual vs Automatic Seam Setter Fit Your Workflow?
The main difference is where the adjustment work happens. A manual seam setter puts the installer in direct control of suction, joining pressure, and slab leveling. An automatic or assisted model may use powered actuation, a pump, or another model-specific mechanism to make those adjustments more repeatable. Neither label guarantees a particular result. The right choice depends on the seam geometry, access, material, crew, and number of seams in the workflow.
Manual setup keeps the operator in control
Manual tools are often configured as a single unit, although the exact design varies by product. One documented manual suction tool uses a fixed cup on one slab and a movable cup on the other. The operator pumps the plunger until the cup attaches, then makes the seam and leveling adjustments with separate controls. On that example, a side knob joins the seam and a top knob levels the slabs. Some setups can use a second top knob when the adjustment requires it. Those mechanics illustrate the type of hands-on control available, not a universal specification for every manual seam setter.
This direct feedback is useful when the installer needs to make small corrections around a changing seam, a tight corner, or a visible lippage issue. It also means the operator must confirm that the cups are seated on suitable, clean surfaces and apply adjustments deliberately. A manual tool can be straightforward to carry and deploy, but its repeatability depends more heavily on consistent setup and operator technique.
Automatic and assisted models shift the adjustment method
Automatic models are available in different configurations. Some are sold as paired tools with a case and pump, while electric seam-setting equipment is marketed for solid-surface work. In practice, "automatic" should be read as a model description rather than a promise that every adjustment is fully powered. Check whether the unit needs a pump, electrical power, paired cups, or a particular operating sequence before selecting it for a jobsite.
The benefit is workflow consistency. When the same crew performs repeated seam work, an assisted actuation system can reduce variation in how the tool is adjusted from one installation to the next. That may be especially relevant for miter joints and waterfall countertops, where automatic suction seam setters are marketed for aligning and securing the joint. It does not remove the need to inspect the slabs, verify cup contact, and check alignment before the adhesive cures.
For a broader look at selection factors such as clamping, leveling, and control, review the best seam setters for quartz countertops. Use that guide for quartz-specific context, then compare each candidate's cup arrangement, adjustment controls, power or pump requirements, and service access against your actual workflow.
When Is a Manual Seam Setter the Better Fit?
A manual seam setter is often the practical choice when seam work is occasional, the installation area is tight, or the crew wants direct control over each adjustment. It keeps the operator close to the joint instead of adding a powered or pump-assisted workflow that may be unnecessary for a small number of seams.
Choose manual control for occasional seam work
For a shop or installation crew that handles seams as part of a broader workload, a manual tool can be easier to bring out, position, and put away. There is less supporting equipment to stage, and the operator can make small corrections while watching the seam, lippage, and edge alignment. That hands-on approach is useful when the joint is not identical to the last one or when the surrounding cabinets and walls limit access.
Manual equipment also makes sense when portability matters. Smaller suction cups are marketed for smaller pieces and tighter spaces, so cup size should be matched to the slab section and the available contact area. A compact setup may be easier to carry through a finished home or position around a backsplash, sink cutout, or other obstruction. It is not a substitute for proper slab handling, however. Large, heavy slabs may still require dedicated lifting equipment, and slabs should be carried and stored vertically away from job traffic.
Understand what the operator is adjusting
One manual configuration illustrates the workflow: a fixed suction cup sits on one slab while a movable cup sits on the adjoining slab. After the cups are attached with their plungers. The operator uses a side knob to draw the seam together and a top leveling knob to correct the height relationship between the pieces. In some setups, one leveling knob is enough; additional adjustment may be needed when the joint requires more expansion or control.
These controls are examples, not universal specifications for every manual seam setter. The important point is that the installer can feel and observe how the pieces respond, then make measured changes rather than relying on a preset cycle. That direct feedback can be valuable on mitered aprons, butt-joints, inside corners, and other joints where access or geometry changes from job to job.
Match the tool to crew skill and workflow
A manual tool rewards a crew that understands suction contact, slab movement, joint preparation, and leveling. New operators need a clear setup routine and supervision until they can recognize when a cup is not seated correctly or when a joint needs a different adjustment. If your broader operation is still being organized, review the stone fabrication shop setup considerations alongside your seam-setting needs.
In the manual vs automatic seam setter decision, choose manual when flexibility, tight access, portability. And operator judgment outweigh the need to repeat the same assisted workflow many times per day.
When Does an Automatic Seam Setter Earn Its Place?
An automatic seam setter may earn a place in a shop when the same seam-setting workflow is repeated often enough that consistent operation matters to the crew. That does not mean the tool is automatically faster, more accurate, or a better choice for every installer. The practical question is whether its actuation method and setup requirements fit the work your team performs regularly.
Repeated seams and crew consistency
For a shop producing multiple countertops with similar seam work. An automatic model can give the crew a repeatable way to position and hold the adjoining pieces while adjustments are made. This can be useful when several installers share equipment or when a lead fabricator needs a process that less-experienced crew members can follow consistently. The tool still requires inspection, correct placement, and judgment. Automation does not remove the need to check the seam, the slab surfaces, or the final alignment.
Consider the pattern of your work rather than a hoped-for return. If seams are occasional and each job has different access constraints, a manual tool may be simpler to stage. If the same type of seam appears across many jobs, an automatic setup may be worth evaluating as part of your stone fabrication shop setup.
Waterfall and miter workflows
Automatic suction seam setters are marketed for aligning and securing miter joints on stone waterfall countertops. They may also suit repeated mitered apron or other angled seam work, provided the tool's geometry, cup arrangement, and working range match the pieces being joined. These applications demand more than simply bringing two edges together. The crew must control the position of the slabs, protect finished surfaces, and watch for lippage as the joint is brought into alignment.
Before choosing a model, confirm that it is intended for the seam geometry you install. A tool configured for a 90-degree application should not be assumed to cover every compound corner, inside corner, butt-joint, or waterfall condition.
Plan around the power or pump setup
Automatic does not describe one universal power system. Some configurations are supplied as a pair with a case and pump, while other electric seam-setting equipment is marketed for solid-surface work. Depending on the model, your crew may need access to a pump, a charged battery, or a suitable power source. Check what is included, how the cups are controlled, and whether the setup is practical at the fabrication bench or on the jobsite before committing to the workflow.
Care is part of the setup
Keep suction cups clean so dust, adhesive residue, and debris do not interfere with contact. Inspect the cups before use and wipe the contact surfaces as needed. Moving threads also need routine lubrication for smooth operation and long service life. Follow the tool maker's care instructions, and store the setter where its cups and adjustment hardware will not be damaged. These small maintenance steps support repeatable use, but they cannot compensate for poorly prepared seam surfaces or unsafe slab handling.
Which Seam Setter Fits Your Material, Crew, and Volume?
The right choice depends less on a simple manual-versus-automatic label than on the work moving through your shop. Start with the material, seam geometry, access conditions, and number of comparable seams your crew handles in a typical week. A tool that suits an occasional butt-joint may not be the best fit for repeated mitered aprons or waterfall edges.
Material compatibility comes first. Quartz and granite slabs, solid-surface work, and other stone-fabrication applications can place different demands on contact surfaces, seam access, and adjustment technique. Confirm that the seam setter is intended for the material and joint configuration in your workflow. Product listings show both manual and automatic configurations across seam-setting categories, while electric equipment is also marketed specifically for solid-surface work. Treat those categories as starting points, not proof that every model handles every slab or joint.
| Decision factor | Manual tendency | Automatic tendency | Buyer checkpoint |
|---|---|---|---|
| Material and joint | Useful when the operator needs hands-on adjustment for a specific slab and seam. | Can support a repeatable setup when the tool is matched to the material and joint. | Verify compatibility with quartz, granite, solid surface, butt-joints, and miter work. |
| Crew skill | Rewards an experienced installer who can make small joining and leveling adjustments. | May help standardize the workflow, but still requires trained setup and inspection. | Decide who will position, adjust, monitor, and release the tool. |
| Seam frequency | Often fits occasional or varied seam work where flexibility matters more than a fixed routine. | Can make sense for repeated seam work with a consistent process and multiple setups. | Review weekly seam volume and whether the same geometry repeats. |
| Access and portability | Typically keeps the operator close to the adjustment, which can suit changing access conditions. | May involve a paired or cased configuration, pump, or other setup requirements. | Measure clearance, carrying distance, storage space, and available power or pump support. |
| Miter and waterfall work | Provides direct control for aligning a particular miter or waterfall edge. | Automatic suction equipment is marketed for aligning and securing miter joints on waterfall countertops. | Confirm the tool supports the angle, slab thickness, and access of the planned joint. |
| Slab handling | Does not replace equipment or procedures for moving large, heavy slabs. | Does not replace equipment or procedures for moving large, heavy slabs. | Plan separate handling with suitable material-handling equipment, and store slabs vertically away from traffic. |
Access can change the decision quickly. Five-inch cups are marketed for smaller pieces and tighter spaces, so cup size deserves attention when a backsplash, narrow return, or confined installation limits working room. For larger work, evaluate how the setter sits on both slabs and whether the crew can inspect the seam without reaching across an unstable setup.
Keep seam setting separate from slab movement and dust control. Large slabs may require a forklift with a boom or an overhead crane, while cutting, grinding, drilling, or breaking countertop products can create respirable crystalline silica exposure risks. Choose the seam setter for alignment and leveling, then plan handling and respiratory-risk controls as independent parts of the job.
For a broader equipment plan, review your stone fabrication shop setup and compare the tool against actual crew assignments, storage, access, and seam volume. That practical review usually produces a better buying decision than choosing based on the mechanism alone.
Shop countertop support systems for your next seam-setting workflow
Setup and Care Practices for Consistent Seams
A seam setter can only help when the slabs, contact surfaces, and tool are prepared for controlled movement. Treat setup as part of the seam operation, not as a quick step before turning a knob or engaging a pump. The same discipline applies whether your crew is using a manual tool or an automatic model.
- Inspect the slabs and seam. Confirm that the pieces are stable, the seam edges are clean and compatible, and the joint geometry matches the planned installation. Look for chips, debris, or damage that could prevent the cups from sitting flat or make alignment misleading. Keep hands clear of pinch points while positioning heavy pieces.
- Clean the contact areas. Wipe dust, slurry, adhesive residue, and loose particles from the cup surfaces and the slab areas where they will attach. Clean suction cups are part of routine seam-setter care, because contamination can interfere with a reliable seal. Inspect the rubber for cuts, distortion, or hardened material before use. Material handling equipment can complement seam-setting tools when slabs require controlled movement.
-
Position the cups deliberately. Place the fixed cup on one slab and the movable cup on the other, with both surfaces fully supported and clear of the seam adhesive. On a manual tool, engage the plunger until the cup is firmly attached. If the tool uses a pump or assisted actuation, check the connections and follow its operating instructions rather than assuming every model works the same way.
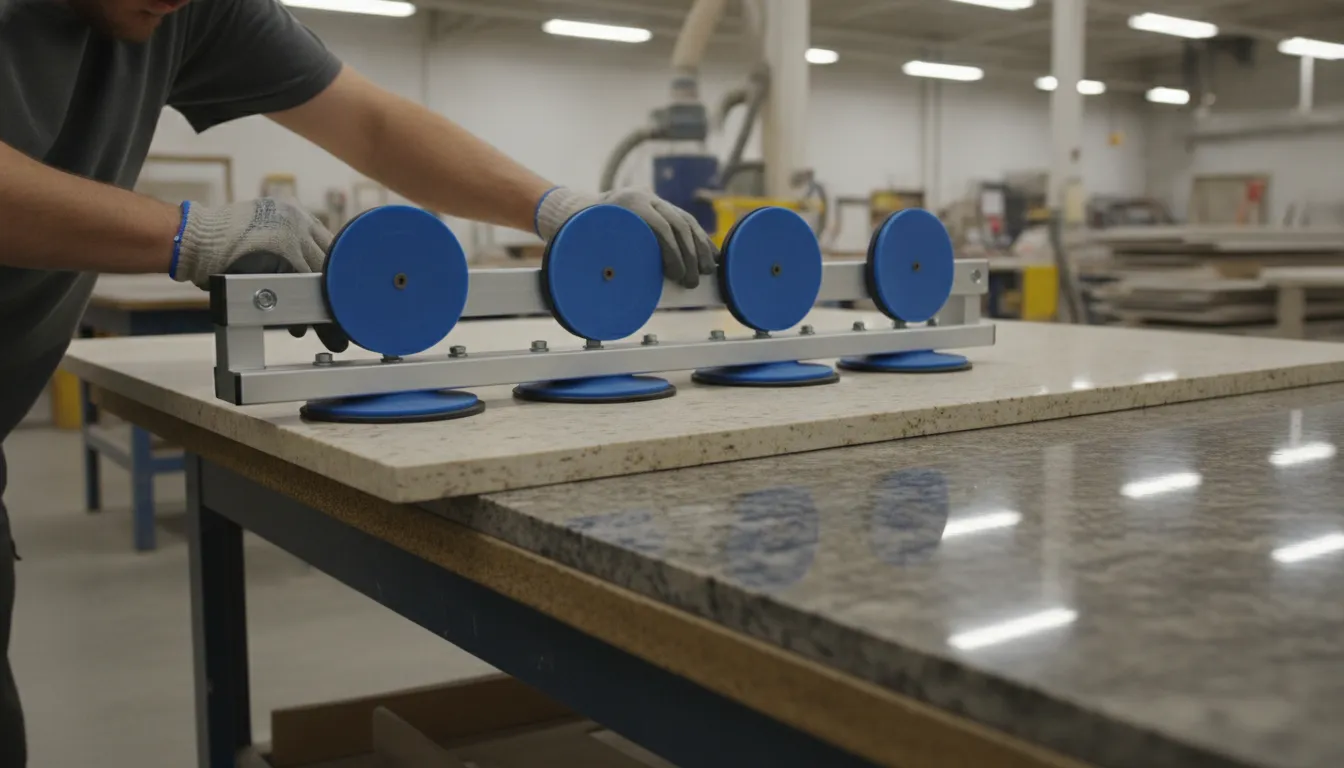
Inspect the tool and cup surfaces before placing them on a seam. - Make small adjustments. Bring the joint together gradually. Use the joining adjustment to close the gap, then use the leveling adjustment to address lippage. Small movements give the installer better control and reduce the risk of shifting the slabs farther than intended. Recheck the seam from more than one angle.
- Verify alignment before the adhesive cures. Check the face, edge, and reveal while the joint remains workable. Do not rely on the setter alone to compensate for an uneven substrate, damaged edge, or poorly supported slab. Maintain safe slab control throughout the adjustment.
- Release and clean the tool. Release suction according to the tool instructions, then remove cups without dragging them across the finished surface. Wipe adhesive and dust from the frame, knobs, threads, and cup faces. Lubricate moving threads as recommended for the equipment so adjustments remain smooth.
- Store it ready for the next seam. Keep the setter protected from impact, moisture, and abrasive debris. Store cups flat and clean, and avoid stacking heavy items on rubber surfaces. Store slabs vertically and away from traffic areas. Large, heavy slabs may require a forklift with a boom or an overhead crane for loading and unloading, while jobsite handling should keep slabs in a vertical position.
Good care protects the repeatability of the workflow without promising a particular result. The setter is an alignment aid, while safe material handling, sound seam preparation, and the installer's judgment remain essential.
Frequently Asked Questions
What does a seam setter do?
A seam setter holds adjoining countertop or stone pieces while you align the joint and correct lippage. Suction cups attach to the slab surfaces, while the adjustment mechanism helps bring the pieces together or level them. The tool supports seam alignment, but it does not replace safe slab handling equipment or a proper installation plan.
Is a manual or automatic seam setter better?
Neither is better for every shop. A manual model gives the operator direct control over incremental joining and leveling. That can make it practical for occasional work, varied seam conditions, or locations where a simple setup matters. An automatic model can help crews maintain a repeatable process across frequent seam work. The right choice depends on the tool configuration, access, crew experience, and available pump or power requirements.
Can one seam setter handle waterfall and miter seams?
Some seam setters are designed for mitered aprons, waterfall edges, butt-joints, and corner work, but compatibility depends on the geometry and the specific cup and adjustment arrangement. Confirm that the tool can reach both surfaces, hold the material securely, and provide the needed angle before starting the seam. A 90-degree configuration may suit certain waterfall applications, while other joints may require a different setup.
How should seam-setter suction cups be maintained?
Keep the cup faces clean and inspect them before each use so dust, adhesive, or debris does not interfere with contact. Check the pump, plunger, and adjustment points for proper operation. For tools with moving threads, regular lubrication supports smooth adjustment. Store the setter where the cups and mechanism will not be damaged, and replace worn sealing components before relying on the tool for a critical seam.
Ready to Choose the Right Seam Setter?
The right setup can make seam work more manageable by matching the tool to your crew, workspace, and project volume. Review the available equipment and compare the support options that fit your countertop workflow.
Review countertop support systems and seam-setting equipment at Diamond Tool Store.