Tile removal is rarely one uniform job. A wide-open floor with a strong bond calls for a different approach than stair edges, tight rooms, adhesive residue, or work in an occupied building. The right purchase balances production rate with substrate protection, operator control, transport, consumables, and cleanup.
The best tile removal tools for contractors depend on project scale, tile bond, substrate, access, and the finish required afterward. Electric tile strippers can make large flooring removals more efficient, while breaker and chisel attachments handle smaller areas and edge work. Floor scrapers support adhesive and residue cleanup, and dust-control equipment helps manage airborne particulate and jobsite cleanup. No single tool is the right choice for every phase.
Start by separating bulk demolition from edge work, surface preparation, and dust management. That distinction makes it easier to compare equipment on the factors that will affect the entire job, not just the first pass.
How Do the Best Tile Removal Tools for Contractors Fit the Job?
The right setup depends on the job, not on a single universally best machine. Before buying, assess the project scale, tile bond, substrate, access, and the finish required after demolition. A tool that removes bonded tile quickly in an open commercial floor may be awkward around walls, stairs, thresholds, or fixtures. The best tile removal tools for contractors are the ones that match the work sequence and reduce avoidable handling.
Separate bulk removal from edge work
For a large, open floor, an electric tile stripper can make sense because powered equipment is designed to remove floor tile efficiently with less manual fatigue. It should be evaluated against the site's access, power availability, transport requirements, and the strength of the tile-to-substrate bond. A professional tile removal machine may be appropriate for production work. A breaker attachment or heavy-duty chisel is often more practical for perimeter work, small rooms, and sections where a larger machine cannot maneuver.
Do not overlook the consumable doing the actual detaching. Match the blade or chisel to the removal task and protect the substrate from unnecessary gouging. Diamond Tool Store's tile removal blades are a relevant starting point when the project calls for a blade-based approach, but the correct choice still depends on the equipment and surface conditions.
Plan adhesive cleanup as a separate operation
Tile removal and substrate preparation are related, but they are not the same task. Once the tile is up, remaining mortar or adhesive may require a floor scraper or another surface-preparation tool. If residue is the primary problem, choose equipment for controlled scraping rather than judging a demolition tool only by how aggressively it breaks tile. In specific applications, infrared technology can soften adhesive and make removal easier, but it should be treated as an application-specific option, not a universal solution.
Treat dust control as part of the purchase
Dust management should be planned before the first strike. Consider source capture, compatible extraction, work-zone containment, cleanup, and the required protective equipment. Mechanical removal can create airborne dust, and potentially hazardous materials require additional controls. EPA NESHAP addresses measures intended to minimize asbestos fiber release during renovation and demolition, while OSHA guidance emphasizes protocols that reduce occupational exposure to hazardous materials. If older flooring or adhesive may contain asbestos or another hazardous substance, stop and follow the required assessment and controls before selecting a removal method.
For a process overview, review Diamond Tool Store's tile removal process, then build the buying decision around production needs, access, cleanup, and jobsite control.
Electric Tile Strippers for Large Flooring Jobs
Powered tile strippers become more useful as the removal area grows, especially when a crew must clear repeated rooms, corridors, retail space, or other broad floor sections. An electric machine can reduce the amount of hand striking and scraping required, but it is not automatically the right choice for every substrate or jobsite. The best tile removal tools for contractors are the ones that match the production need, tile bond, floor condition, and access limits.
Start with working width and production demands
Working width affects how many passes are needed across an open floor. A wider head may improve coverage in clear, uninterrupted areas, while a narrower machine can be easier to steer around columns, doorways, partitions, and built-in fixtures. Consider the total removal area, the number of rooms, and how much edge work will remain after the main passes. Electric tile strippers are generally suited to efficient removal on larger projects, but production depends on the tile bond and the condition of the substrate, not width alone.
Review the professional tile removal machine as one option for larger flooring work. Use its product information to confirm whether the machine's configuration fits the planned application instead of assuming that one tool covers every tile or adhesive condition.
Evaluate transport, power, and operator control
A machine that works well on the floor still has to reach it. Check doorway dimensions, elevators, ramps, stair access, loading requirements, and available storage before selecting powered equipment. Confirm the site's electrical supply and plan cable routing so cords do not create trip hazards or interfere with other trades.
Operator control matters during long removal runs. Look for a setup that allows the operator to maintain a steady path, respond to changing resistance, and keep the tool positioned without excessive strain. A machine may be productive in an open area but awkward in tight rooms or around obstructions. Plan for a smaller tool, chisel, or manual method at edges rather than forcing a large stripper into spaces where it cannot be controlled safely.
Match the machine to bond and access
Test a representative area before committing the full crew to a removal method. Tile that releases cleanly in one room may be firmly bonded elsewhere, and adhesive left behind can change the next phase of work. A test also reveals whether the machine is removing tile only or taking up adhesive layers as well. Compare the floor and tile removal machine with the job's access, substrate, and cleanup requirements, then reserve separate equipment for residue removal and final surface preparation.
When Are Breakers, Chisels, and Scrapers the Better Choice?
Large powered machines are not always the right answer. On a small bathroom, a stair landing, a narrow corridor, or a room with fixed obstructions, a breaker or chisel attachment can provide better access and control. These tools let a contractor work selectively instead of bringing a larger machine into a space where maneuvering is difficult.
Breakers and heavy-duty chisels are especially useful for loosening stubborn tiles, opening an edge. And working around walls, cabinets, thresholds, or other areas a floor machine cannot reach cleanly. They are also practical for limited demolition where the setup time for powered equipment would outweigh the production benefit. Choose the attachment according to the tool platform, tile bond, substrate, and level of control the job requires. Do not assume that a more aggressive impact tool is safer or faster on every floor.
After the tile is up, the job changes. Remaining mortar, thin-set, and adhesive can prevent the next flooring system from bonding or sitting flat. Surface preparation is therefore part of the buying decision, not an afterthought. Specialized ceramic removal tools can support targeted tile work, while tile removal blades are suited to heavy-duty removal applications. Confirm the blade or accessory is appropriate for the equipment and substrate before starting.
| Tool type | Best fit | Primary consideration |
|---|---|---|
| Breaker attachment. | Small areas and initial edge work. | Impact control and substrate risk. |
| Heavy-duty chisel. | Edges, corners, and obstructions. | Platform compatibility. |
| Manual floor scraper. | Residue and final cleanup. | Blade angle and finish. |
| Powered floor scraper. | Large cleanup areas. | Access and surface condition. |
The table separates the main roles. Use breakers and chisels to remove tile where precision and access matter. Use scrapers to prepare what remains. Keeping those stages separate helps contractors select accessories that match the actual work instead of expecting one tool to handle demolition and final cleanup equally well.
What Dust Control Should Tile Contractors Plan For?
Dust control should be designed into the removal plan before the first tile is lifted. The right approach depends on the tool, substrate, adhesive, room size, and whether other trades or occupants are nearby. A machine that removes tile quickly can still create a difficult cleanup problem if the work area, extraction, and operator protection are treated as afterthoughts.
Control dust at the source
Start by selecting a removal method that limits unnecessary pulverizing. Use the correct blade, chisel, or scraper for the material, keep the tool engaged at a controlled angle, and avoid repeatedly striking areas that are already loose. Where the equipment supports it, connect extraction close to the point of generation. Verify that the vacuum, hose, fittings, and filters are compatible with the tool and rated for the type and volume of particulate expected. An undersized or poorly sealed system can move dust around the room instead of containing it.
Contain the work zone
Separate the removal area from finished spaces with appropriate barriers and sealed openings. Plan the route for debris before demolition begins, and avoid carrying dusty materials through occupied rooms when another path is available. Shut down or isolate ventilation that could distribute particulate, while following the site's normal requirements for maintaining safe air conditions. Use a designated staging area for broken tile, adhesive waste, and contaminated disposable materials. Clean progressively rather than waiting until the end of the shift. A controlled work zone protects adjacent surfaces and makes the final substrate inspection more reliable.
Use PPE and investigate hazardous materials first
Workers should use the respiratory, eye, hearing, hand, and foot protection required by the site's hazard assessment and applicable safety program. PPE is the last line of defense, not a substitute for source capture and containment. Before disturbing older flooring, mastics, backer materials, or other suspect products, determine whether a hazardous-material survey or testing is required. Do not assume that a familiar-looking adhesive is harmless.
The EPA's NESHAP asbestos requirements address renovation and demolition controls intended to minimize the release of asbestos fibers. OSHA likewise discusses safety protocols for mechanical chipping and other removal equipment. These controls help reduce occupational exposure to hazardous materials. If suspect material is present, stop and follow the project's qualified assessment, containment, and disposal procedures. Do not improvise a removal method or make medical or legal assumptions based on appearance alone.
For contractor planning, dust control belongs on the same checklist as production rate and tool access. Confirm extraction, barriers, PPE, waste handling, and hazardous-material precautions before choosing the removal equipment.
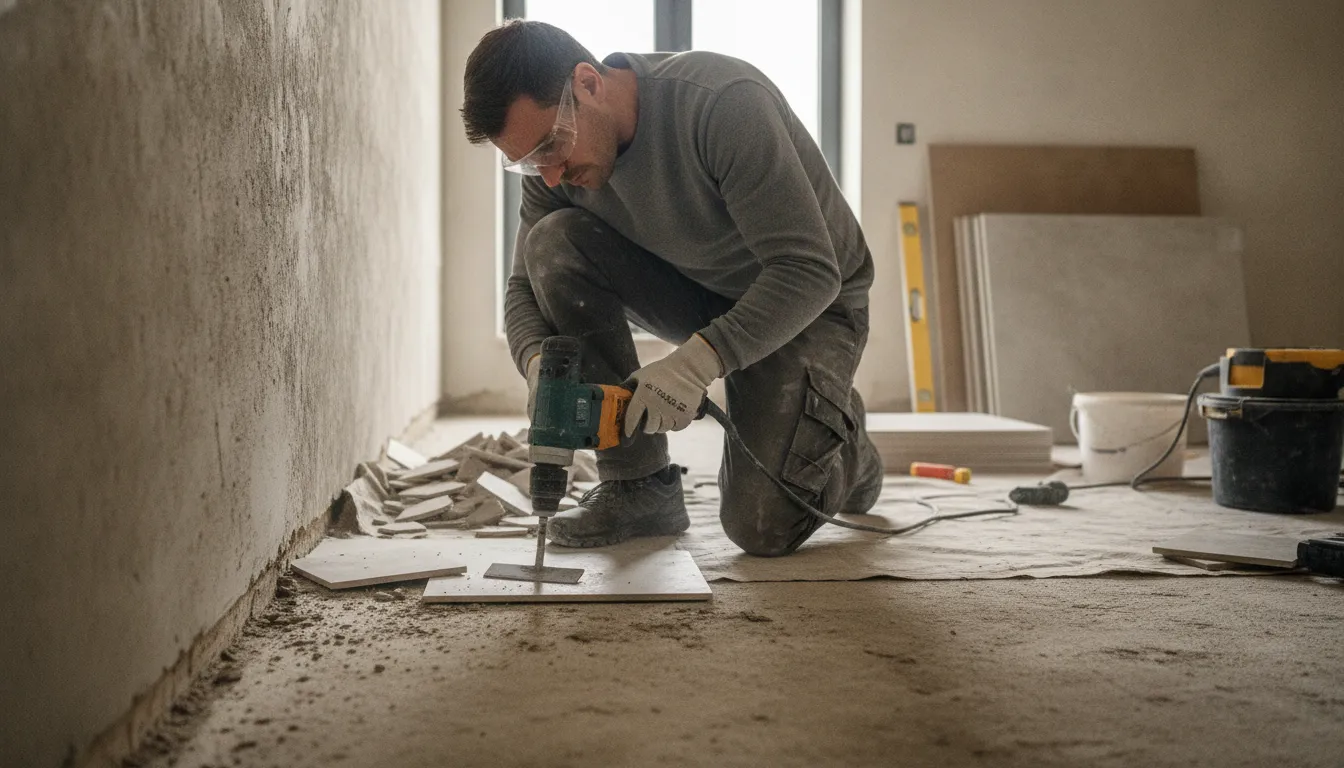
Match the Tool to Tile, Adhesive, and Substrate
The right removal setup depends on more than tile size. Bond strength, substrate condition, working height, access, and the finish required after demolition all affect the choice. A tool that performs well across an open concrete floor may be too aggressive for a wood subfloor. Too bulky for stairs, or poorly suited to an occupied facility.
Ceramic and porcelain tile
Ceramic tile may release in manageable pieces when the bond is weak or the installation is relatively recent. Making a breaker, chisel, or compact powered tool practical for smaller areas. Porcelain is often denser and can resist impact differently, so contractors should test a small section before committing to a removal method. If the test creates excessive substrate damage or leaves widespread bonded fragments, change the attachment, angle, or machine rather than simply increasing force. A selection of specialized ceramic removal tools can help match the approach to the tile and access conditions.
Thin-set, thick-set, and adhesive layers
Thin-set residue may call for a scraper, chisel, or surface-preparation attachment after the tile is lifted. Thick-set beds and heavily bonded installations can require a more robust breaker or powered stripper, particularly when the goal is bulk removal across a large floor. Do not assume the tool that removes the tile will also leave a ready-to-cover surface. Plan a separate cleanup pass for mortar, mastic, or adhesive. In some specific adhesive applications, infrared technology may soften the bond and make removal easier, but its suitability should be confirmed through a controlled test area.
Concrete, wood, edges, and stairs
Concrete generally gives contractors more latitude for powered impact and scraping, but the desired finish still matters. If the slab must remain intact, use controlled passes and inspect for gouging. Wood substrates need a lighter, more deliberate approach because damage to the subfloor can add repair work. Edges, corners, thresholds, and stairs favor compact tools, hand tools, or breaker and chisel attachments that allow better positioning. Large machines may improve production in open areas but become inefficient when operators must repeatedly reposition them.
Occupied or restricted spaces
Hospitals, retail areas, offices, and other occupied spaces make dust, noise, transport, and containment part of tool selection. Favor equipment that can be moved through the available route and paired with suitable dust-control measures. Protect adjacent finishes and isolate the work zone where possible. Before mechanical removal, identify whether existing materials could contain hazardous substances. OSHA guidance addresses controls for mechanical chipping and removal, while EPA NESHAP requirements address asbestos fiber release during renovation and demolition. Follow the applicable regulations and site safety plan rather than treating production speed as the only buying criterion.
A Contractor's Workflow From Demo to Ready Substrate
A productive tile-removal job is easier to manage when the crew treats demolition and substrate preparation as separate phases. The right sequence limits rework, reveals tool-fit problems early, and makes the next flooring installation more predictable. Use this workflow alongside Diamond Tool Store's tile removal process reference, then adjust the equipment choice to the project conditions.
- Assess the site before choosing the primary tool. Confirm the tile type, approximate bond, substrate, area to be cleared, access route, working height, and disposal plan. Note edges, doorways, stairs, tight rooms, and occupied areas that may require a smaller or more controlled tool. If existing flooring or mastic could contain asbestos, pause the normal demolition plan and follow the applicable requirements. EPA guidance addresses asbestos in floor tile and mastic, while OSHA identifies nonaggressive methods as preferred for asbestos-containing flooring. See the EPA floor tile and mastic guidance before proceeding.
- Run a controlled test area. Select a representative section and test the planned blade, chisel, scraper, or powered machine. Watch how cleanly the tile releases, how much material remains bonded to the substrate, and whether the tool is damaging the surface below. A short test can show whether the selected setup fits the bond and access conditions better than a product label alone.
- Remove the bulk of the tile. Work systematically through the open floor, maintaining a clear path for the operator and debris handling. Larger projects may justify an electric tile stripper for efficient floor-tile removal. While a breaker or chisel setup can be more practical where the work area is limited or irregular. Do not assume one machine is best for every substrate or bond.
- Finish edges, corners, and obstructions. Return with a suitably controlled attachment or hand tool around walls, thresholds, columns, fixtures, and transitions. These areas often need a different approach than the open floor. Protect adjacent surfaces and avoid forcing a large machine into access conditions it was not designed to handle.
- Clean adhesive and mortar residue. After the tile is lifted, switch from removal to preparation. Use a floor scraper or other appropriate surface-preparation tool to address remaining adhesive, mortar, and loose fragments. Keep the work area orderly so residue is not mistaken for sound substrate.
- Inspect, clean, and prepare the next floor. Check for remaining high spots, weak areas, cracks, contamination, and transitions that could affect the next installation. Plan cleanup with the material and site controls in mind. OSHA guidance emphasizes minimizing occupational exposure when mechanical removal equipment is used. Complete the specified substrate preparation only after the surface is genuinely ready for the next trade.
What Should a Tile Removal Tool Buying Checklist Include?
A contractor's buying checklist should start with the job, not the tool category. Estimate the floor area, tile bond, substrate, access route, and finish required after removal. A machine that fits an open commercial floor may be impractical in a bathroom, stairwell, occupied building, or room with limited power and ventilation.
Production and jobsite fit
- Production: Match the removal method to the project scale. Powered tile strippers may be worth evaluating for larger floors, while breakers, chisels, or hand tools can make more sense for small sections and detail work.
- Substrate and bond: Confirm that the tool and attachment suit the tile, mortar, adhesive, and underlying surface. Separate bulk tile removal from the later task of scraping adhesive or leveling residue.
- Access: Check doorways, elevators, stairs, turning radius, floor loading, and storage. Account for how the equipment will enter and leave the site, not only how it operates once in place.
Ergonomics, consumables, and service
- Operator control: Look for a working position, controls, vibration profile, and maneuverability that fit the planned hours and surface conditions. A tool that is difficult to steer can slow production even when it has adequate power.
- Consumables: Identify the compatible blades, chisels, scraper edges, and other wear parts before purchase. Confirm how quickly they can be changed and whether replacements are available for the material being removed.
- Support: Review the manual, warranty terms, maintenance requirements, parts availability, and service path. These details matter when a machine is part of a recurring demolition workflow.
Dust and cleanup requirements
Plan dust control as part of the purchase. Evaluate source capture, compatible extraction, work-zone containment, cleanup methods, and the personal protective equipment required by the site plan. NIOSH cautions that dry sweeping can create silica-containing dust clouds, so do not treat cleanup as an afterthought. If flooring or mastic may contain asbestos, pause for identification and follow the applicable controls. EPA guidance addresses asbestos requirements for floor tiles and mastic, while OSHA identifies less-aggressive removal methods as preferred for asbestos-containing flooring.
Use this checklist to compare diamond tools for surface work alongside the removal machine, attachments, wear parts, and dust-control equipment your crew will actually need.
About Sally Thedwall

Sally Thedwall writes practical equipment guidance for Diamond Tool Store, helping contractors compare specialized tools for tile, concrete, stone, and related jobsite work. Her focus is clear selection advice that connects equipment choices to application, access, material, and workflow.
Frequently Asked Questions
What is the most effective tool for removing floor tile?
For large flooring projects, an electric tile stripper is often the most efficient starting point because it is built for repeated tile removal across open floor areas. Choose based on tile bond, substrate, access, working width, transport, and available power rather than assuming one machine fits every job.
What tool should contractors use for edges and tight areas?
A breaker attachment or heavy-duty chisel is usually more practical around walls, doorways, corners, stairs, and small repair areas. These tools provide better access than a larger stripper, but they require careful control to avoid gouging the substrate.
Do contractors need a floor scraper after removing tile?
Usually, yes. Tile removal and substrate preparation are separate stages. A floor scraper can help remove remaining mortar, thin-set, adhesive, and loose residue after the tile has been lifted. This leaves the surface easier to inspect and prepare for the next floor.
How should contractors control dust during tile removal?
Plan dust control before work begins by using source capture or compatible extraction, containing the work area, and following the required respiratory and jobsite controls. NIOSH does not recommend blowers or dry sweeping for silica-containing residue because those methods can create large dust clouds: NIOSH silica guidance.
What if old tile or mastic may contain asbestos?
Stop and follow applicable testing, containment, and removal requirements before disturbing suspect materials. EPA guidance explains that asbestos NESHAP controls are intended to minimize fiber release during renovation and demolition, while OSHA identifies nonaggressive methods as preferred for asbestos-containing flooring: EPA asbestos guidance.
Shop Tile Removal Tools for Contractor Jobs
The right removal setup helps your crew match the tool to the flooring material, project scale, access, and cleanup requirements. Diamond Tool Store supplies specialized equipment for tile and surface work, so you can compare options before the next renovation or flooring job.