


How to Use Diamond Grinding Cup Wheels on Concrete
Concrete grinding is not just a matter of running an abrasive over the slab. The wheel, grinder, surface condition, and dust-control setup all affect whether you remove defects cleanly or leave gouges, glazing, and unnecessary wear on the tool.
Shop diamond grinding tools at Diamond Tool Store
To learn how to use diamond grinding cup wheels on concrete, match the wheel to the concrete and the finish you need. Inspect the equipment, connect effective dust collection, and keep the grinder flat with steady pressure. Work in controlled passes rather than forcing a deep cut. Remove all dust before applying a coating, adhesive, or overlay.
By Sally Thedwall
Sally Thedwall writes practical equipment guidance for stone fabrication, concrete, construction, and restoration professionals at Diamond Tool Store.

Good results start before the motor turns on. Inspect the equipment, test a small area, and define the required surface profile. These checks confirm that the setup suits the slab and the next stage of the project.
How to Use Diamond Grinding Cup Wheels on Concrete Starts With Preparation
Preparation determines whether a cup wheel produces a consistent concrete profile. Inspect the slab, wheel, grinder, guard, and dust-control system before grinding. Remove loose debris, identify high spots and coatings, and test the setup in a small area before covering the full work zone.
Good results start before the grinder touches the slab. Walk the work area and identify cracks, joints, soft patches, high spots, coatings, adhesive residue, exposed aggregate, and anything that could catch the wheel. Remove loose debris and confirm that the concrete is suitable for the finish you need. Diamond cup wheels are used to remove surface imperfections, level concrete, and open the pores for coatings, so the prep should match the final surface requirement.
Inspect the wheel, grinder, and work area
Inspect the cup wheel before every use. Do not install or operate one with structural cracks, missing segments, or significant wear. These defects can affect performance and create a tool-failure hazard. Check that the wheel diameter, arbor, guard, and rated operating speed are compatible with the grinder. Make sure the grinder is unplugged or otherwise isolated while changing the wheel, and confirm that the guard and handle are secure before starting.
Clear bystanders and unnecessary materials from the work zone. Protect nearby equipment from dust, and plan how you will manage cords, hoses, edges, and transitions. If you are grinding near a wall or fixed object, allow enough room to keep the tool stable instead of twisting it into the edge.
Set up PPE and dust control first
Concrete grinding can generate dust that contains crystalline silica. According to NIOSH, inhaling this dust can contribute to silicosis, lung cancer, kidney disease, reduced lung function, and other serious health problems. Use the required respiratory protection and other job-appropriate PPE, including eye protection, hearing protection, gloves, protective footwear, and clothing suited to the work.
Use a local exhaust ventilation shroud connected to a high-efficiency dust collection system. NIOSH reports that an LEV shroud attached to a handheld grinder can significantly reduce worker exposure, while a direct-connected, HEPA-filtered vacuum captures dust at the source. Follow the equipment manufacturer instructions and your site's silica-control requirements. Do not rely on a disposable dust mask as a substitute for proper engineering controls or an established respiratory protection program.
Test the setup on a small area
Before committing to the full floor, test-grind an inconspicuous section. Check the wheel's cut, the grinder speed, the pressure required, and the resulting profile. This confirms that the setup will remove the intended material without gouging the concrete or leaving a finish that is too rough for the next step. It also gives you a chance to adjust dust collection, work direction, and edge strategy before the surface is visible.
How Do You Choose Diamond Grinding Cup Wheels on Concrete?
Choose a diamond cup wheel by matching grit, bond hardness, segment design, diameter, arbor, and concrete condition to the removal job. Coarser grit and open segment patterns suit aggressive stock removal, while finer tooling and a suitable bond help refine the surface. Always confirm grinder compatibility and test the result first.
Start with the concrete, the amount of material to remove, and the finish required. A wheel that is aggressive enough for leveling a high spot may be unnecessarily coarse for final surface preparation. Before committing to a full run, test a small, inconspicuous area. This confirms that the grit, bond, segment pattern, and grinder setup produce the profile you need without damaging the slab.
| Selection factor | What to look for | Best fit |
|---|---|---|
| Grit | Lower grit numbers use larger diamond particles and cut more aggressively. | Use coarse 6/8 to 16/20 grit for heavy removal and leveling. Choose 30/40 or finer for refining before a coating. |
| Bond hardness | The bond controls how quickly fresh diamond is exposed during grinding. | Use a soft bond on hard concrete so diamonds stay cutting. Use a hard bond on soft, abrasive concrete to improve wheel life. |
| Segment pattern | Segment layout affects aggressiveness, contact area, and the finish left behind. | Arrow and other open aggressive patterns suit stock removal. Double-row, turbo, or continuous-rim styles can be better when you need a more controlled or refined cut. |
| Wheel diameter | A larger wheel covers more area, but it must suit the grinder and the work area. | Match the diameter to the grinder's rated capacity, guard, spindle, and operating speed. Use a smaller wheel where access and control matter more than coverage. |
| Grinder compatibility | Check the arbor or threaded fitting, maximum RPM, guard clearance, and grinder power before installation. | Choose a wheel explicitly rated for the grinder and concrete application. Never rely on a fitting that is loose, improvised, or outside the manufacturer's specifications. |
How should the segment style match the job?
Segment style changes the contact pattern, cutting behavior, and material-removal rate. For a focused edge or spot-repair setup, compare a single-row cup wheel with a more open segmented option. If adhesive, epoxy, or grout is the main problem, review an aggressive PCD cup grinder instead of assuming a standard diamond cup wheel is the best first tool.
For a high spot, coating residue, or other material that must come off quickly, an aggressive arrow segment can make the first pass more productive. You can use arrow segment grinding wheels for aggressive stock removal when the application and grinder support that approach.
For broader preparation where a more even scratch pattern is important, compare a double-row or turbo configuration. A continuous rim may suit controlled edge work or a finer contact pattern. The exact result still depends on concrete hardness and operator technique.
If you are still comparing models, select the right diamond grinding cup wheel by confirming its grit, bond, segment design, diameter, and fitting against the job requirements. A vacuum brazed segmented cup wheel may suit a different removal pattern, so compare the tool design with the concrete and finish. The goal is not simply the fastest cut. It is a wheel that removes the required material while leaving a consistent surface for the next process.
How to Use Diamond Grinding Cup Wheels on Concrete Step by Step
Use a diamond cup wheel in controlled stages: inspect the setup, connect dust extraction. Start with a test pass, keep the grinder flat, move steadily, and check the profile between passes. Do not force a deep cut. Let the diamonds remove material while you maintain stable contact and safe control.
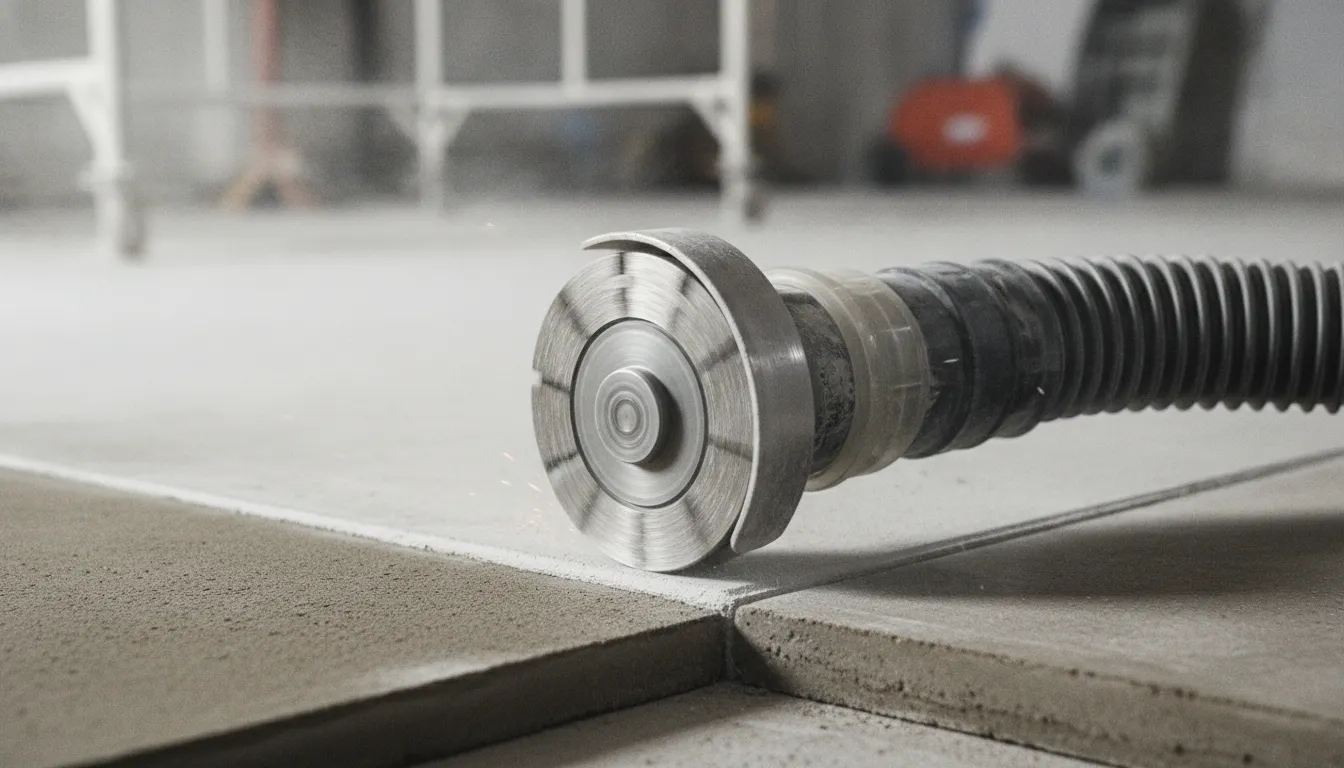
- Confirm the surface and the equipment. Remove loose debris, identify high spots or surface imperfections, and make sure the grinder is suitable for the wheel diameter and arbor. Diamond cup wheels are used to smooth imperfections, level concrete, and open the concrete pores for coatings or overlays. Match the wheel and grinder to the scale of the work. A handheld grinder is useful for edges, repairs, and smaller areas, while broad floors may require floor-grinding equipment.
- Inspect the wheel before mounting it. Look for structural cracks, missing segments, loose parts, or significant wear. Do not operate a cup wheel with damage that could compromise its balance or integrity. Check the grinder guard, spindle, flange, and retaining hardware as well. Install the wheel according to the grinder manufacturer's instructions, then make sure it is seated correctly and tightened securely. Keep the grinder unplugged or isolated from its power source during setup.
- Connect dust control before starting. Grinding concrete can release dust containing crystalline silica. Use the grinder's shroud with a high-efficiency dust collection system connected directly to it, and confirm that the hose and seals are secure. A local exhaust ventilation shroud helps capture dust at the source. Wear the required eye, hearing, respiratory, and other personal protective equipment for the jobsite and follow the applicable safety requirements.
- Test a small, inconspicuous area. Start with a short test grind to confirm that the wheel, grinder speed, and operating method produce the required surface. Check how quickly the concrete is being removed and whether the finish is too aggressive or too smooth for the next application. This test can reveal a mismatch before it affects the entire floor. Adjust the wheel or technique based on the result, rather than trying to correct an unsuitable setup through extra pressure.
- Start the grinder before contacting the concrete. Hold the tool securely with both hands where the grinder design allows. Bring the rotating wheel into the work gradually. Keep the cup wheel flat against the concrete, or use only the contact angle allowed by the equipment manufacturer. A tilted grinder can gouge the surface, especially when using an aggressive wheel. Maintain a stable stance and keep the power cord and vacuum hose clear of the rotating tool.
- Use controlled, overlapping passes. Move the grinder steadily across the work area instead of holding it in one place. Use even pressure and let the diamonds perform the cutting. Do not force the tool. Work in overlapping passes so ridges and untouched strips are not left between tracks. Keep the movement consistent, and inspect the surface frequently. For leveling, make several controlled passes rather than trying to remove all the material at once.
- Manage pressure, depth, and heat. Avoid taking an excessively deep cut in a single pass. Heavy pressure can slow the wheel, increase heat, and glaze the diamond segments, reducing grinding efficiency and shortening tool life. If removal is slow, verify the wheel bond, grit, grinder performance, and concrete hardness instead of simply pushing harder. Pause when the wheel or grinder shows signs of excessive heat, vibration, or unusual performance, and correct the cause before continuing.
- Check the finish between passes. Stop the grinder before setting it down and examine the surface under suitable lighting. Confirm that high spots are being reduced evenly and that the profile matches the coating, overlay, adhesive, or repair system that will follow. Vacuum the work area as needed so dust does not hide remaining imperfections. Continue with light, deliberate passes until the required surface is consistent, then complete the final cleanup before the next installation step.
How Do You Control Concrete Grinding Dust?
Control concrete grinding dust at the source with a properly fitted shroud and high-efficiency dust collector. Keep the vacuum connected, inspect airflow and filters, and follow the site's silica-control plan. Use required respiratory, eye, hearing, hand, and foot protection, and clean the work area without dry sweeping.
Concrete grinding can release airborne dust that contains crystalline silica. Breathing this dust can cause serious health problems, including silicosis, lung cancer, kidney disease, and reduced lung function. Dust control is therefore part of the grinding setup, not an optional cleanup step. The right system captures dust where it is created while keeping the grinder moving smoothly across the work area.
For more information about the health hazards and engineering controls associated with concrete grinding, review the CDC and NIOSH guidance on silica dust controls.
Use a shroud and high-efficiency vacuum
Fit the grinder with a properly seated dust shroud that surrounds the diamond cup wheel as closely as the tool design allows. A local exhaust ventilation, or LEV, shroud helps pull dust away from the operator at the point of generation. NIOSH found that attaching an LEV shroud to a handheld electric concrete grinder can significantly reduce worker exposure to hazardous crystalline silica dust.
Connect the shroud directly to a high-efficiency dust collection system. A HEPA-filtered vacuum is designed to capture fine particles that a general-purpose shop vacuum may exhaust back into the work area. Check the hose, fittings, seals, and filter before starting. A loose connection or clogged filter can reduce airflow and allow dust to escape around the shroud. Empty or service the collection system according to the vacuum manufacturer's instructions, and avoid opening the container in an occupied work area.
Keep the grinding pass controlled
Dust collection works best when the grinder is operated consistently. Keep the cup wheel flat against the concrete and use even pressure. Do not force the tool into the slab or lift the shroud far enough to create a visible gap. Move at a steady pace so the wheel removes material without digging in or stalling. Excessive depth in one pass can overheat the diamond segments, glaze them, and reduce grinding efficiency. Shallow, controlled passes are easier on the wheel and help the vacuum keep up with the material being removed.
Wet grinding can be appropriate for some equipment and applications, but it changes the cleanup and waste-handling requirements. Follow the grinder, wheel, and jobsite procedures for the method selected. Do not improvise a wet setup on equipment that is not designed for it.
Clean the area after the final pass
Wait for airborne dust to settle only when the work area and site procedure allow it, then remove residue with an industrial vacuum or the approved wet-cleaning method. Do not dry sweep or use compressed air to redistribute fine dust. Pay attention to edges, joints, corners, and the area around the grinder. After grinding, the concrete must be clean and free of loose dust and debris. Residual powder can interfere with the bond of coatings, adhesives, or sealants, leaving an otherwise well-prepared surface unable to perform as intended.
Hand Grinder or Floor Machine: Which Is Right for the Job?
Use a handheld grinder for edges, repairs, tight areas, and smaller sections. Use a floor machine for broader, accessible areas where consistent coverage and production control matter. The correct choice depends on floor size, access, removal depth, dust collection, and the finish specification.
The right machine depends on the surface area, access, and amount of correction required. A handheld grinder gives you control around walls, steps, columns, drains, and other obstructions. It is also useful for feathering edges, removing a small concrete lip, or repairing an isolated high spot without setting up a larger machine.
A floor machine is the better fit when the work covers a broad, open slab. Its wider grinding path and more consistent contact can make production work faster and help maintain a uniform profile across the floor. It is less practical in tight corners, along vertical edges, or on small repair areas where maneuverability matters more than coverage.
| Application | Handheld grinder | Floor machine |
|---|---|---|
| Edges and corners | Strong choice. The compact body and smaller wheel can reach perimeter areas and detail work. | Limited. Plan for a handheld grinder to finish areas the machine cannot reach. |
| Spot repairs | Efficient for isolated ridges, lips, adhesive residue, and small high spots. | Usually excessive for a small correction and may remove more surrounding material than needed. |
| Broad slabs | Works, but requires more passes and careful overlap to avoid visible variation. | Preferred for open floors where coverage and a consistent working pattern are priorities. |
| Production preparation | Best for detail work, transitions, and touch-ups around the main grinding area. | Best for sustained removal and leveling across large, accessible sections. |
Whichever machine you use, treat the cup wheel as a cutting tool rather than a device to force through the slab. If you are comparing equipment for a broader prep plan, review the concrete grinding tools buying guide before choosing a machine or accessory. Keep the grinder flat, use even pressure, and let the diamonds do the work. Tilting a handheld grinder can gouge the concrete, especially with an aggressive wheel. Excessive pressure can also overload the motor. Avoid trying to remove too much material in one pass. Deep grinding can overheat the diamond segments, glaze them, and reduce efficiency. These technique principles are especially important when moving from a small repair to a larger preparation run. Review concrete grinding techniques before starting production work.
For a handheld setup focused on concrete correction and edge work, spiral grinding wheels can help achieve a smoother concrete surface when the wheel and finish requirements are properly matched.
Shop jumbo spiral cup wheels for concrete grinding
How Do You Know the Surface Is Ready for Coating?
A ground concrete surface is ready for the next material when its profile is consistent with the coating. Adhesive, or sealant specification and the slab is clean, sound, and free of loose dust. Inspect edges and repairs, confirm the test area, and remove all residue before application.
Grinding is complete when the concrete has the profile your coating, adhesive, or sealant system requires, not simply when the floor looks cleaner. Surface preparation is a critical part of bond behavior. A coating applied over weak surface material, remaining laitance, or loose debris can fail even when the product itself is suitable. After the final pass, inspect the entire work area under good light and confirm that the surface is consistent with the specification for the system being installed.
Inspect the finished profile
Look for a uniform, mechanically prepared surface rather than isolated polished spots or deep tracks. The grind should remove the surface imperfections and contaminants that were targeted without leaving gouges, ridges, or abrupt transitions. Pay particular attention to edges, corners, repairs, and areas around posts or walls, where a hand grinder may not have matched the passes made across the open floor.
Run a clean hand across a small area only after the grinder is stopped and the equipment is secured. The surface should feel stable, with no loose grains or powdery material that can be brushed away. If the profile is too aggressive for the planned coating, do not try to hide it with extra resin. Refine the surface with the appropriate tooling. If the grind is inconsistent, correct those areas before applying material, because the coating will follow the prepared surface rather than erase the preparation.
Use a test area before committing to the full application
A small test grind in an inconspicuous location verifies the selected cup wheel, grit, and operating method. Confirm the required finish without damaging the concrete. The same test area can help check coating or adhesive response when product instructions permit it. Compare the result with the project specification and the coating manufacturer's preparation requirements before proceeding. This check is useful when hardness, repairs, or residues vary across the slab.
Remove dust and debris completely
Vacuum the floor thoroughly after the final grind, including along walls, around joints, and in low areas where dust collects. Remove remaining debris with the cleaning method approved for the coating system. Do not assume that a surface is ready because the visible dust cloud has cleared. Fine concrete dust left on the slab can interfere with the bond of coatings, adhesives, and sealants. The finished surface should be clean and dust-free before mixing or placing the next material.
Record the inspection result and any areas corrected. Once the profile is consistent, the test area is acceptable, and cleanup is complete. Protect the prepared concrete from traffic and new contamination until the coating, adhesive, or sealant is installed.
Frequently Asked Questions
What is a diamond grinding cup wheel used for on concrete?
A diamond grinding cup wheel removes surface imperfections, levels uneven concrete, smooths edges, and opens the concrete pores for coatings or overlays. Select the wheel and grinder combination based on the amount of material to remove and the finish required.
How do you choose the right diamond cup wheel for concrete grinding?
Start with the concrete hardness, removal rate, and desired finish. Coarse grits such as 6/8 through 16/20 suit heavy removal and leveling, while 30/40 and finer grits are better for refining the surface before a coating. Match the bond to the slab: soft bonds suit hard concrete, while hard bonds generally last longer on soft, abrasive concrete.
What safety precautions are necessary when using a diamond cup wheel?
Inspect the wheel before every use and reject it if it has cracks, missing segments, or significant wear. Keep the grinder flat, use even pressure, and do not force the tool. Concrete grinding dust can contain crystalline silica, which is linked to silicosis, lung cancer, kidney disease, and reduced lung function, according to NIOSH. Use a shroud with high-efficiency dust collection and appropriate protective equipment.
Can you use a diamond cup wheel for both grinding and polishing?
One cup wheel is not intended to produce every finish. Use an aggressive segment design and coarse grit for stock removal, then change to progressively finer tooling when the job requires a smoother or polish-ready surface. For coating, epoxy, or residue removal, compare a vacuum brazed cup wheel for concrete and epoxy against the selected segmented wheel. Test a small inconspicuous area first to confirm the result.
Why does a concrete grinder motor stop when using a cup wheel?
Excessive pressure, an overly deep pass, or a wheel that does not match the concrete can overload the grinder. Reduce the depth of cut, let the diamonds do the work, and keep the machine moving with steady contact. Deep single-pass grinding can also overheat or glaze the segments, reducing cutting efficiency.
Get Started With the Right Concrete Grinding Tools
Matching the cup wheel to the concrete, grinder, and desired finish helps keep surface preparation controlled and consistent. When you are ready to choose equipment for the job, review Diamond Tool Store's selection of diamond grinding tools and cup wheels.
Shop Diamond Tool Store diamond grinding tools and cup wheels